Showing posts with label Halloween. Show all posts

Saturday, September 9, 2017

Trio of Inexpensive Vintage Halloween Crafts


I recently participated in the Vintage Halloween Swap on Craftster, and had the fabulous good fortune to be partnered up with my friend FiberAlchemist.  The first thing I decided on making was  a Spider Web Table Topper, that I saw the pattern for on Red Heart's website.  It calls for 1 skein of their Super Saver, but since I hate how scratchy that stuff feels, I made mine with most of a skein of Premier Yarns Everyday Soft Worsted Heather in charcoal for the web, and half a skein of Lion Brand Heartland in Yosemite for the lacy edging, both dug out of my stash. 


While I was making it, I discovered a flaw in the pattern.  Sadly I was on the last row of webbing at the time!  I went back and rewrote the pattern, made myself a crazy color coded chart, and even a matching set of rainbow stitch markers to match the chart, and re-crocheted the whole thing.  Glad I did though, since it came out so much nicer after I fixed the pattern.  Since the yarn came from stash, the only cost was my time in frogging and rewriting the pattern. 


Since I was trying to craft from stash as much as possible, I decided to look around and see what I could make with my Silhouette.  I found some black and orange card stock, and some silver ribbon with black edging that I knew FiberA would like.  I bought the cameo cut files from the Silhouette store, which was the only cost. 


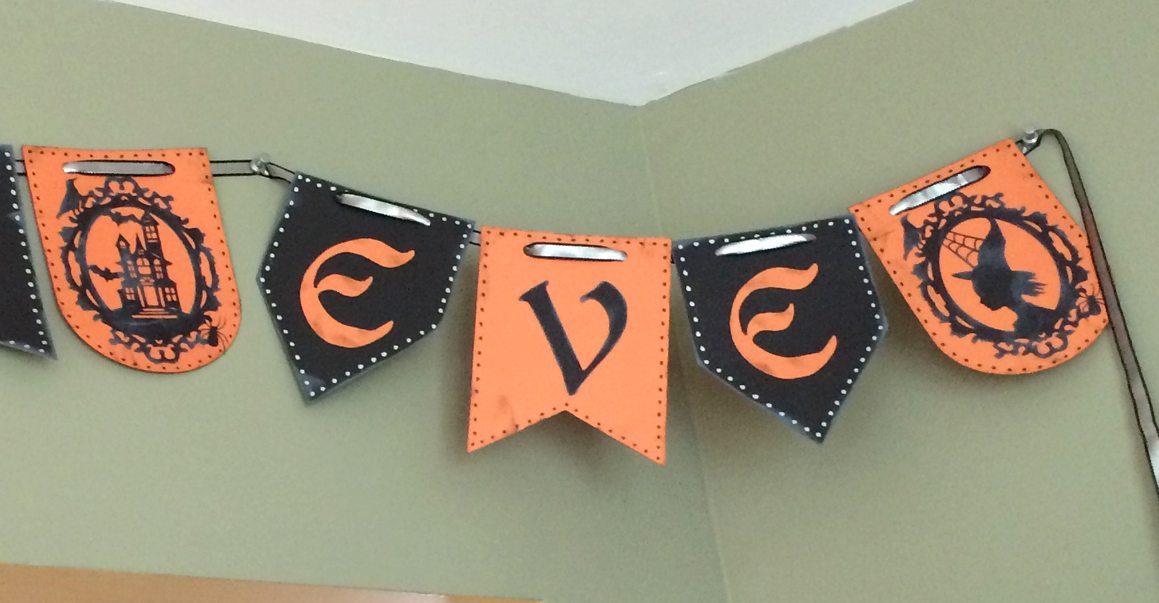
After cutting all the bits and pieces, I distressed everything with some Tim Holtz distress ink pads, distress paint pads, and markers, before putting it all together with glue dots.  Not bad for a $4 project!


My final project for FiberA was a sign I saw a tutorial for on the Silhouette blog, which called for cutting the words out and using the 'dead space' as a stencil instead of using the words themselves.  Then using a paint pen to 'scribble' in the letters, and removing the vinyl to leave the scribbles behind.  I started off by following the tutorial, but sadly, that just did NOT work.  The paint pen bled under the vinyl stencil so much that the words were completely illegible!  So I sanded the paint off, and started over.  I used the Silhouette for what it was intended, by cutting the words out of silver vinyl, and applying them like normal.  But there was a bit of dead space at the top, so I added a scrolly skull to fill it in.  I like how it kinda feels like a tombstone with the curved top.  The wooden sign came from Michael's, and was priced as $10.99, but I had a 50% off coupon, so it was $5.49, plus $2 for the cut files from Silhouette.  That made a grand total of $11.49 for 3 awesome projects. 

Friday, October 7, 2016

Gather Ye Rosebuds Halloween Wreath

In May of this year my husband and I bought our first house.  For the last several months we've been getting settled in, decorating our new space bit by bit.  We've mostly worked on the interior, since summer in the South is too brutal to take on outdoor projects.  Now with the weather finally cooling down, I've been able to enjoy regular morning walks around the neighborhood with the puppy.  On our walks I've loved seeing people out in their yards, decorating for fall.  There are pumpkins and mums on every front porch, and one house covered in caution tape and spiderwebbing.  All of it has made me want to decorate our house too.  So where to start?  How about at the front door, with a creepy Halloween wreath to welcome visitors into our home?


I looked around at some of the wreaths for sale in the regular craft and home decor stores, but they were all either incredibly expensive or very poor quality.  So I decided to make one myself, to keep the cost down by the quality high.  This is the result!  I'm calling it my Gather Ye Rosebuds Wreath, and it makes me very happy hanging on my front door.  Best of all, it only cost $16.50 to put together!  Want to make one yourself?  Well then let me show you how...


You'll need:
18" burlap wrapped straw wreath base, like this one at Joann's (which I bought with a 50% off coupon)
3-4 packages of 'creepy cloth' from Dollar Tree
4 stems of black roses from Dollar Tree
2-3 stems of purple roses from Dollar Tree
Small skull from Dollar Tree
Hot glue gun
Glue sticks
Black marker
1 yard black satin ribbon (optional)
Indoor/Outdoor Command Hook (optional)


Use your marker to draw lines dividing your wreath base into quarters.  This will help you keep track of how much creepy cloth you are using to wrap around the base.  Next, open your packages of creepy cloth, and completely unfold them.  Mine were 30"x72", which sounds like a lot of cloth until you remember just how thin it is.  Gather the cloth roughly at an angle near one end.  By holding it at an angle, you will taper out one piece, while you overlay the next piece, allowing you to get good coverage, without lumps where one piece ends and the next begins.  Use a line of hot glue to attach the cloth along the back of the wreath.  Now wrap the cloth, stopping to adjust so that you don't have bare patches peeking through.  As you come to the end of the first piece, add a line of glue, and simply start wrapping the next piece over the end of the last one.


I bought 4 piece of creepy cloth, but only ended up using 3 to cover my wreath.  (I guess that 4th one will decorate my mantle!)  Don't worry if there are some ragged bits or stray strings here and there.  It just adds to the death shroud texture that we're aiming for.  Now it's time to start laying in the roses.  Remove the roses, leaves and any other bits from the flower stems.  (Mine came with a glitter covered spider or bat on each bunch.)  You'll want to remove the plastic pieces from the leaves, but not from the roses, or those will fall apart.  Decide where you would like your skull to be.  I wanted mine centered at the bottom of the wreath, with roses running up along the sides.  Give yourself a mark for the placement of the skull, but don't attach it yet.  Instead glue a black rose on each side of where the skull will be, crowding them in closer than you think you'll want them.  Add two more black roses beneath those so that the center feels full.  Now go ahead and glue in your skull, taking care to nestle it between the flowers, so it seems to be emerging from beneath them.


Now that you have your skull in place, it's time to lay in some leaves.  Use more hot glue to lay some of them flat, hanging just off the edge in either direction, partway up each side of the wreath.  This will help fill in any gaps between the roses with additional texture.  Now let's add in a purple rose on each side, between the black roses already there.  Continue layering in more roses in black with the occasional purple one thrown in to break up the color.


My roses also came with little feathery bits of plastic on the ends of the stems.  Cut these apart, and add a blob of glue to the ends, tucking them between the flowers and leaves, and place them around the wreath.  I added mine feathering off the top edges of the roses on the sides, behind where I wanted my skull, and along the bottom edge of the wreath.  Now take a look at your skull.  Mine had some paint on it, darkening the eye sockets but it wasn't very dark.  Use your magic marker to add some definition between the teeth, and along any cracks in the skull.


That's it!  You now have a chic new Halloween wreath.  Very Martha Stewart.  If Martha decided to move to a Mockingbird Lane.   I had planned to hang mine from a metal over-the-door wreath hanger, but couldn't find it in the holiday decorations.  Since none of the stores in town seemed to have them yet either, I grabbed an outdoor Command Hook from Big Lot's, and hung the wreath from a loop of black satin ribbon.


Now I clearly need something more fun and festive for the welcome mat.  Wonder what I can come up with for that...

Saturday, October 10, 2015

Are You a Good Witch or a Bad Witch?

I'm afraid I've gotten a bit behind on my blogging.  My only excuse is that I've been crafting so many extra Harry Potter and Outlander bracelets to put away for the holiday rush. But I have managed to get around to a few new designs.  This first one is probably my favorite new design in a while.  It was inspired by my partner edelC in the Back to Hogwarts Swap on Craftster.  Hers was the prototype, but this is version 2.0


While witches and ghosts and ghouls in orange and black abound at Halloween, I wanted something a little sweeter, that could be worn all year long, so the beads are a mix of deep teal, purple velvet, jet black and crystal clear.  Most of the beads have an AB finish to lend the design some extra shimmer.


The charms include cauldrons, swirling stars, spell books, broomsticks, cats, magic wands, hearts, witch hats, and a fantastic witch on a broom from TierraCast charms.  I like how sleek and clean the lines of the charms are on this one, giving it a slightly modern feel.


I have some new wine charms to share soon, full of autumn and Halloween goodness.  Meanwhile, I can't wait for Halloween itself.  This is the first time we'll be home during Trick or Treating for the last several years, and I'm really hoping we get a good turnout of kids coming our way.  


How about you guys?  Are you all ready for Halloween?  Any fantastic costumes in the making?