Showing posts with label free pattern. Show all posts

Tuesday, September 10, 2019

Kingfisher Shawl - A Free Crochet Pattern

Kingfisher Shawl
By Jennie Ingram

The Kingfisher Shawl is soft, drapey, and generously sized for cuddling with your favorite book.  

Skill Level: Intermediate
Finished Size: 64" across the top; 30" from center back to point

Materials:
-2 skeins Lion Brand Heartland in Pinnacles (Turquoise, noted as color A in pattern)
-1 skein Lion Brand Heartland in Great Sand Dunes, (Tan, noted as color B in pattern)
-1 skein Lion Brand Heartland in Sequoia, (Brown, noted as color C in pattern)
-1 skein Lion Brand Heartland in Cuyahoga Valley, (Teal, noted as color D in pattern)
-6mm crochet hook
-Tapestry needle

Gauge: 7 rows of 14 dc = 4”

Abbreviations:
Ch: Chain
Dc: Double crochet
Hdc: Half double crochet
Sk: Skip
Sp: Space

Notes: At the beginning of each row ‘ch 4’ counts as dc + ch 1.  

Shawl
Beginning: With color A ch 4, sl st to form a ring.

Row 1: Ch 3, 2 dc, ch 3, 3 dc.

Row 2: Ch 4 (counts as dc, ch 1), turn work. Dc in same st, ch 1, sk 1, dc in next sp, ch 1, (dc, ch 3, dc in ch-3 sp), ch 1, dc in next dc, ch 1, sk 1, dc, ch 1, dc in final st. (8 dc, 1 ch-3 sp).

Row 3: Ch 4, turn work.  Dc in same st, (ch 1 sk 1, dc in next dc) 3 times, ch 1, (dc, ch 3, dc in ch-3 sp), (ch 1, sk 1, dc in next dc) 3 times, ch 1 dc, ch 1, dc in final st. (12 dc, 1 ch-3 sp). 

Row 4: Ch 4, turn work.  Dc in same st, ch 1, *dc in top of next dc, ch 1*. Repeat across to last dc on that side. Ch 1, dc, ch 3, dc in ch-3 sp. *Ch 1, dc in top of next dc*. Repeat across to second to last dc.  Ch 1, dc, ch 1, dc in last st. (16 dc, 1 ch-3 sp).

Rows 5: Repeat Row 4. (20 dc, 1 ch-3 sp).

Rows 6: Repeat Row 4. (24 dc, 1 ch-3 sp).

Rows 7: Repeat Row 4. (28 dc, 1 ch-3 sp).

Row 8: Change to color B. Ch 4, turn work.  Dc in same st. Dc in each dc and in each ch 1 sp across to ch-3 space. Dc, ch 3, dc in ch 3 sp. Dc in each dc and in each ch 1 sp across to second to last dc. Dc, ch 1, dc in last sp. (58 dc, 1 ch-3 sp).

Row 9: Change to color C. Repeat Row 4. (34 dc, 1 ch-3 sp).

Row 10: Repeat Row 4. (38 dc, 1 ch-3 sp). 

Row 11: Change to color D. Ch 3, turn work.  Hdc in same st. Hdc in each dc and ch 1 space across to ch 3 sp. Hdc, ch 3, hdc in ch-3 sp. Hdc across to second to last st. Hdc, ch 1, hdc in last sp. (76hdc)

Row 12: Change to color C. Repeat Row 4. (42 dc, 1 ch-3 sp).

Row 13: Repeat Row 4. (46 dc, 1 ch-3 sp). 

Row 14: Change to color B. Repeat Row 8. (94dc 1 ch-3 sp).

Row 15: Change to color A. Repeat Row 4. (52 dc, 1 ch-3 sp). 

Row 16: Repeat Row 4. (56 dc, 1 ch-3 sp).

Row 17: Repeat Row 4. (60 dc, 1 ch-3 sp).

Row 18: Repeat Row 4. (64 dc, 1 ch-3 sp).

Row 19: Repeat Row 4. (68 dc, 1 ch-3 sp).

Row 20: Repeat Row 4. (72 dc, 1 ch-3 sp).

Row 21: Repeat Row 4. (76 dc, 1 ch-3 sp).

Row 22: Change to color D. Repeat Row 8. (154 dc, 1 ch-3 sp). 

Row 23: Change to color C. Repeat Row 9. (82 dc, 1 ch-3 sp). 

Row 24: Repeat Row 9. (86 dc, 1 ch-3 sp). 

Row 25: Change to color B. Repeat Row 11. (174 hdc)

Row 26: Change to color C. Repeat Row 9. (92 dc, 1 ch-3 sp). 

Row 27: Repeat Row 9. (96 dc, 1 ch-3 sp). 

Row 28: Change to color D. Repeat Row 8. (194 dc, 1 ch-3 sp).

Row 29: Change to color A. Repeat Row 4. (102 dc, 1 ch-3 sp).

Row 30: Repeat Row 4. (106 dc, 1 ch-3 sp).

Row 31: Repeat Row 4. (110 dc, 1 ch-3 sp).

Row 32: Repeat Row 4. (114 dc, 1 ch-3 sp).

Row 33: Repeat Row 4. (118 dc, 1 ch-3 sp).

Row 34: Repeat Row 4. (122 dc, 1 ch-3 sp).

Row 35: Repeat Row 4. (126 dc, 1 ch-3 sp).

Row 36: Change to color B. Repeat Row 8. (254 dc, 1 ch-3 sp). 

Row 37: Change to color C. Repeat Row 9. (132 dc, 1 ch-3 sp). 

Row 38: Repeat Row 9. (136 dc, 1 ch-3 sp). 

Row 39: Change to color D.  Repeat Row 11. (274 hdc, 1 ch-3 sp). 

Row 40: Change to color C.  Repeat Row 9. (142 dc, 1 ch-3 sp).

Row 41: Repeat Row 9. ( 146 dc, 1 ch-3 sp). 

Row 42: Change to color B.  Repeat Row 8. (294 dc, 1 ch-3 sp). 

Row 43: Change to color A.  Repeat Row 8. (300 dc, 1 ch-3 sp). 

Border
Row 44: Ch 3, 2 dc in same, *ch1, sk 2 sp, sc, ch 1, sk 2 sp, 3 dc in next*.  Repeat to second to last dc of this side.  3 dc in last dc.  Ch 1, 3 dc in ch-3 sp.  Ch 1, 3 dc in next dc, *ch 1, sk 2 sp, sc, ch 1, sk 2 sp, 3 dc in next*.  Repeat across to end. 

Row 45: Ch 1, turn work. Sc in same sp. Ch 3, sk next 2 dc and ch 1 sp, *dc in sc sp. Ch 3, sk ch 1 and next dc. Sc, ch 1, sc in next dc (center dc of from previous round’s 3dc cluster), ch 3.*  Repeat from * to * across to last sc on this side.  Ch 3, sk ch and 1 dc sp, (sc, ch 1, sc) in next dc, ch 3, (sk dc, ch 1, dc), dc in center point, *ch 3, (sk dc, ch 1, dc), sc, ch 1, sc in next dc, ch 3, dc in sc sp*.  Repeat across to last sc sp on this side. Ch 3, sc in last dc. 

Row 46: Ch 1, turn work. Sc in same sp. Ch 1, *(2 dc, ch 1, 2 dc) in top of dc.  Ch 1, sc in ch-1 sp between sc sts of previous row, ch 1*.  Repeat from * to * across to last sc on this side. Ch 1, (3 dc, ch 1, 3 dc in point), ch 1. *Sc in ch-1 sp between 2 sc sts of previous row, ch 1, (2dc, ch 1, 2 dc) in top of next dc, ch 1.*  Repeat from * to * across to last dc on this side. Ch 1, sc in final sc.  

Fasten off, weave in ends.

Copyright © 2019 by Jennie Ingram * All rights reserved.  No portion of this pattern may be reproduced, transmitted, or distributed by any means, whether for free or for sale.

Saturday, May 11, 2019

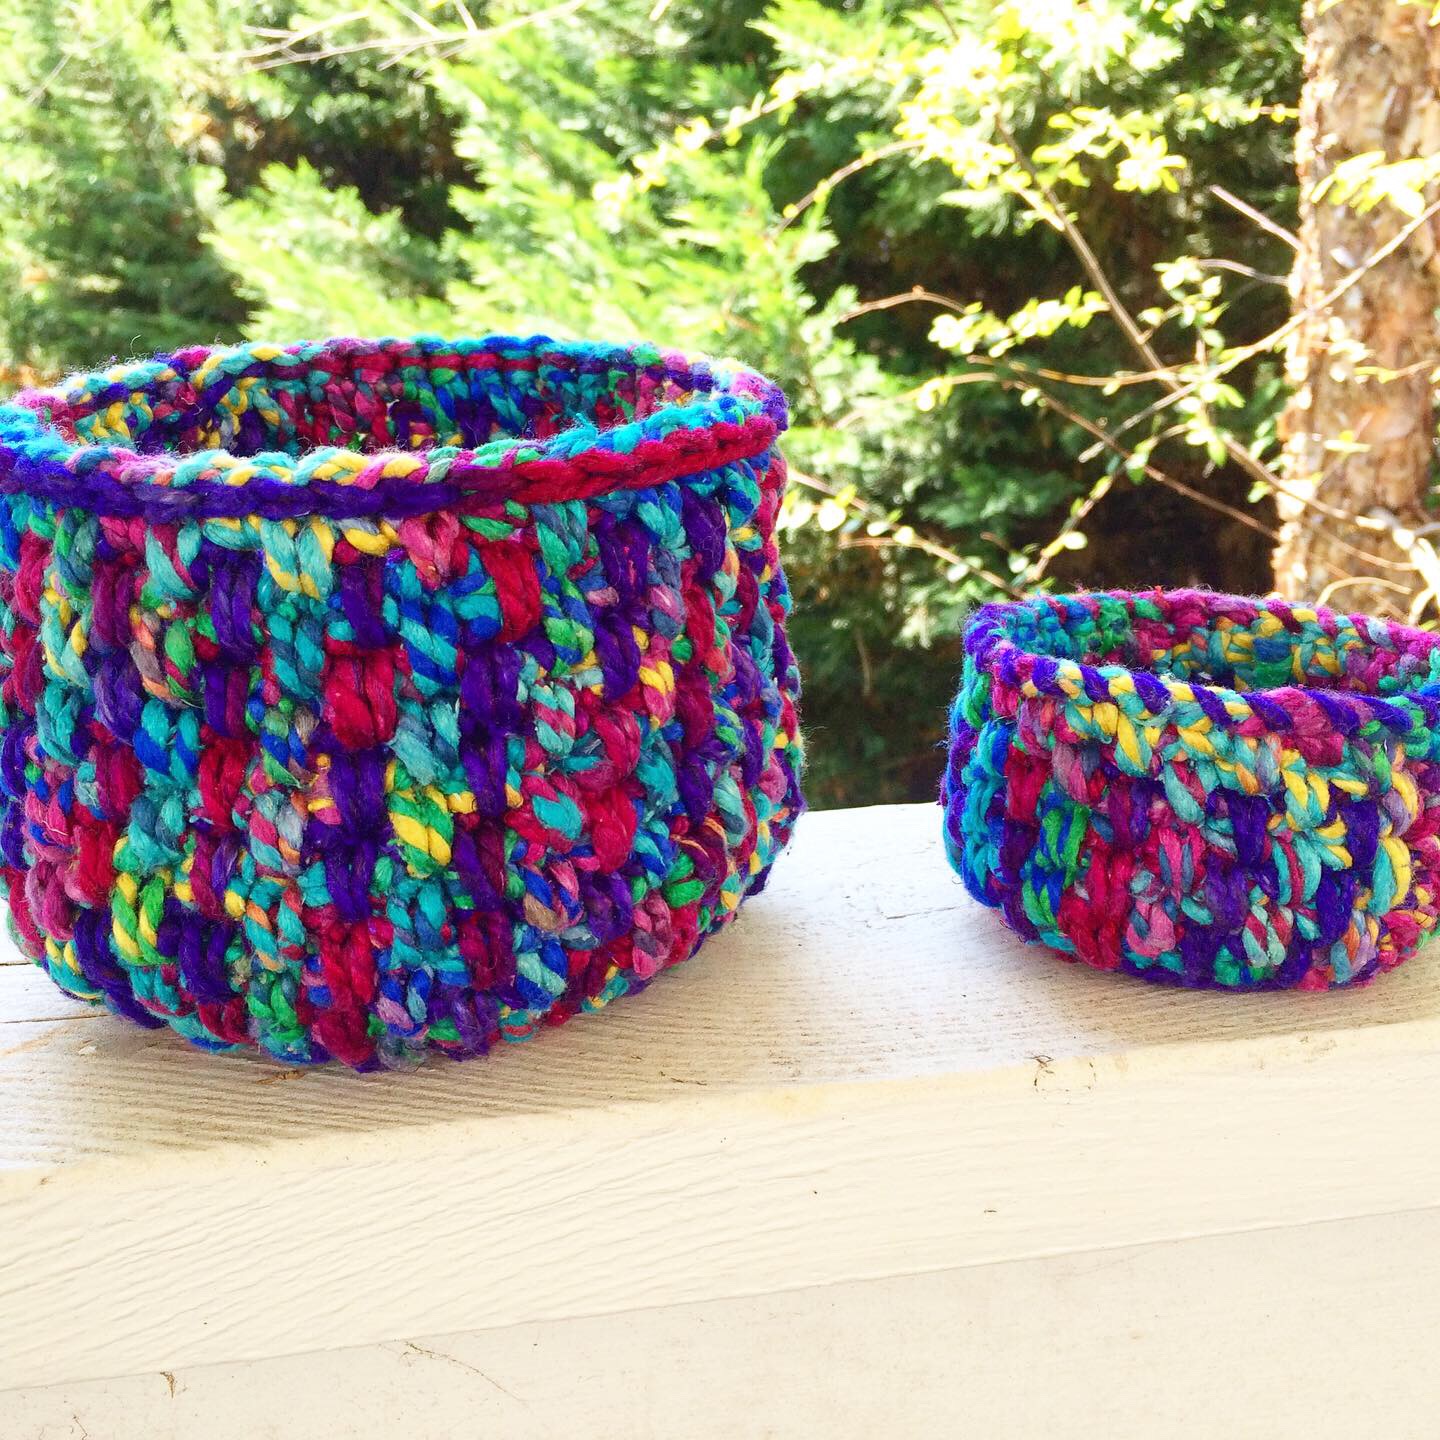
Good Stuff Baskets


These baskets were made for jemimah in the Use the Good Stuff Swap on Craftster, hosted by craftylittlemonkey.  The idea of the swap is that life is short, so we should use the treasured craft supplies we would otherwise hoard, while we can. 

While digging through my stash of silk yarns, I came across these two bright skeins from two months worth of Darn Good Yarn's monthly subscription box.  I poked around Ravelry, trying to find some inspiration from other crafters.  I saw an awesome post from user marianheart, where she combined the same two skeins I was trying to, into some baskets, based on a pattern for a floor pouf. 

I decided I wanted to make something similar, and so I wrote my own pattern, using what I think is the same stitch (alternating spike stitch), but changing the base to one I've made a million times for bags and bowls.  I made a large and a small basket out of the two skeins, and would have made a medium sized one if I had more yarn.  The patterns for both the big & small, and the nonexistent medium size, are written out below. 


**LARGE BASKET**
Rounds 1-7: Start with the Begonia, and crochet in the round, with 6 sc increases per row. (42 sc at end of round 7)

Row 8: Change to Machu Pichu (without cutting previous yarn - the spike stitches and the abundance of colors in the yarns help hide the jog between rows, which will be on the inside of the basket).  Do a row of sc in **back loop only** to start the sides.

Row 9: Change to Begonia (without cutting previous yarn); do a row of [alternating spike stitch][1].

Row 10: Change to Machu Pichu (without cutting previous yarn); do a row of alternating spike stitch.

Row 11-22: Continue doing rounds of alternating spike stitch, changing colors without cutting yarn, in each row.  You will end with Machu Pichu.

Row 23: Add a round of [decorative slip stitch][2] in Begonia.

Finish off, weave in ends.


**SMALL BOWL**
Rounds 1-5: Start with the Begonia, and crochet in the round, with 6 sc increases per row. (30 sc at end of round 5)

Row 6: Change to Machu Pichu (without cutting previous yarn - the spike stitches and the abundance of colors in the yarns help hide the jog between rows, which will be on the inside of the basket).  Do a row of sc in **back loop only** to start the sides.

Row 7: Change to Begonia (without cutting previous yarn); do a row of [alternating spike stitch][1].

Row 8: Change to Machu Pichu (without cutting previous yarn); do a row of alternating spike stitch.

Row 9-12: Continue doing rounds of alternating spike stitch, changing colors without cutting yarn, in each row.  You will end with Machu Pichu.

Row 13: Because I had more Machu Pichu than Begonia left, I did a final row of alternating spike stitch in Machu Pichu (so 2 rows in that color). 

Edging: Thread the remaining end of the Begonia on a yarn needle.  Run the needle up through the back of rows 12 & 13, to hide this longer jog.  Add a whip stitch along the top edge of the basket. 

Finish off, weave in ends.


If I had more yarn, I would do a medium size version, so here's a pattern for a medium size basket.

**MEDIUM BASKET**
Rounds 1-6: Start with the Begonia, and crochet in the round, with 6 sc increases per row. (36 sc at end of round 6)

Row 7: Change to Machu Pichu (without cutting previous yarn - the spike stitches and the abundance of colors in the yarns help hide the jog between rows, which will be on the inside of the basket).  Do a row of sc in **back loop only** to start the sides.

Row 9: Change to Begonia (without cutting previous yarn); do a row of [alternating spike stitch][1].

Row 10: Change to Machu Pichu (without cutting previous yarn); do a row of alternating spike stitch.

Row 11-18: Continue doing rounds of alternating spike stitch, changing colors without cutting yarn, in each row.  You will end with Begonia.

Row 19: Add a round of [decorative slip stitch][2] in Machu Pichu.

Finish off, weave in ends.

Tuesday, April 9, 2019

Crocheted Car Accessories & Striped Seatbelt Cozies

My husband & I have been a 1 car family since we were dating.  Somehow, this always worked for us.  For a while we worked near one another during the same shift, later I walked to work and he took the car to his job, and after that I started working from home.  This helped us save money, and was good for the environment, but over the past year it has been hard.  With his job further away from the house, and me often handling our errands and things like taking the dog to the vet, it seemed time to get a second car.  He chose the Fiat 500e, an all electric vehicle which he can charge at home and work, and we could afford to buy outright.  That left me to inherit our cheerful little red Prius-C.


Since it became mine in August, I've been wanting to make it a bit more 'me' that I did when it was a shared vehicle.  So I have been working over the last few weeks to create some crocheted accessories for it, including a steering wheel cover, shifter knob cozy, and finally some seat belt cozies.  The steering wheel cover was made from Sylver Santika's Steering Wheel Cozy pattern with I Love This Cotton! yarn in black, burnt sienna & strawberry violet.  If you give the pattern a go, be sure to pay close attention to the pattern, which requires specific gauge sizing, and three different hook sizes.  If you're not careful about the gauge, you could end up with a cover that is too loose and slides around while you drive.


I made up the pattern for the shifter knob, without paying much attention.  The center circle is a granny circle, similar to the one found HERE. After that I worked a few rows of sc in the round, and finished with 2 rows of dc, in which I didn't connect the ends with a slip stitch, but rather simply turned the work and crocheted in the opposite direction, decreasing as necessary to try to get the right size for my shifter knob.  There was some trial and error, and frogging of stitches, before I got it to the right size.  Once I was happy with it, I put it onto the knob, then used the tail of the yarn to stitch those last two rows closed around the shaft.  The yarn was the same I Love This Cotton!, with the addition of the color pewter.


Finally there were the seat belt cozies.  Being very short, I often have problems with seat belts cutting into my neck, and so I created some nice soft cozies to keep from being scratched while I drive.  I went with a fun striped pattern and mismatched buttons to increase the crafty girl vibe.  I've written out the pattern below.


Striped Seat Belt Cozies

Skill Level: Easy

Materials:
-50 yards of worsted weight yarn in 4 colors (per cozy)
-4.5mm crochet hook
-yarn needle
-scissors
-five 1/2" or 5/8" buttons per cozy
-hand sewing needle
-button thread

Notes:
-Fits standard 2" wide seat belts.
-Written in US crochet terms
-When changing colors, you can stitch over the tail of the new yarn, leaving less ends to weave in.
-This pattern follows the color scheme for the black cozy pictured below.  You can make each cozy a different color, or keep them all the same to suit your tastes.


Abbreviations: 
Ch = chain
Hdc = half double crochet
Dc = double crochet

Color A: Black
Color B: Red
Color C: Grey
Color D: Purple

Instructions:
Row 1: With color B chain 22. Hdc in 3rd ch from hook. Hdc in each st across. (21 hdc)

Row 2: Change to color A. Ch 2, turn work, hdc in same st and each st across. NOTE: Ch 2 does NOT count as hdc from here on. (21 hdc)

Row 3: Ch3, turn work. Dc in same st, ch 1 and skip next hdc to form buttonhole. Dc in remaining sts across. (20 dc & 1 ch 1 sp)

Row 4: Ch 2, turn work. Hdc in same st and each st across. (21 hdc)

Row 5: Change to color C. Ch 2, turn work, hdc in same st and each st across. (21 hdc)

Row 6-8: Repeat rows 2-4. (21 hdc; 20 dc & 1 ch 1 sp; 21 hdc)

Row 9: Change to color D. Ch 2, turn work, hdc in same st and each st across. (21 hdc)

Row 10-12: Repeat rows 2-4. (21 hdc; 20 dc & 1 ch 1 sp; 21 hdc)

Row 13: Change to color B. Ch 2, turn work, hdc in same st and each st across. (21 hdc)

Rows 14-16: Repeat rows 2-4. (21 hdc; 20 dc & 1 ch 1 sp; 21 hdc)

Row 17: Repeat row 5. (21 hdc)

Rows 18-20: Repeat rows 2-4. (21 hdc; 20 dc & 1 ch 1 sp; 21 hdc)

Row 21: Repeat row 9. (21 hdc)

Finish off and weave in ends.

Sew on five 1/2” or 5/8” buttons. Fold over your seat belts and button closed.

Wednesday, December 19, 2018

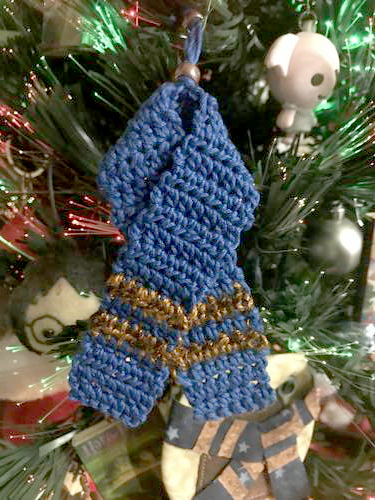
Ravenclaw Scarf Ornament - With Pattern

I recently had the pleasure of swapping with lindyv321 in the Harry Potter Holiday swap.  She's a Ravenclaw, and I decided to create a tiny Ravenclaw House scarf for her.  I looked around for patterns, but didn't like the sizes of the ones I could find, or I didn't have the right sized yarn, so I just made up my own based on what I had on hand.  I've included the pattern below in case anyone else wants to make one for themselves.


Ravenclaw House Scarf Ornament

You will need:
Sport Weight cotton yarn in your choice of colors (I used Omega Sinfonia)
3.25 mm crochet hook
needle to weave in yarn ends

Row 1: With Blue, chain 7, sc in 2nd ch from hook. Sc in next 5 across. (6 sc)
Row 2-4: hdc across (6 hdc)
Row 5: Change to bronze, hdc across (6 hdc).
Row 6: Change to blue, hdc across (6 hdc).
Row 7: Change to bronze, hdc across (6 hdc).
Row 8-41: Change to blue, hdc across (6 hdc).
Row 42: Change to bronze, hdc across (6 hdc).
Row 43: Change to blue, hdc across (6 hdc).
Row 44: Change to bronze, hdc across (6 hdc).
Row 45-47: Change to blue, hdc across (6 hdc).
Row 48: sc across ( 6sc).

Finish off, weave in ends.

Fold scarf around, and make 2 tacking stitches with some spare blue yarn, to keep it in a folded shape. Cut 2 strands of yarn 14” long, and string them through the top of the ornament. Tie a knot, then slip on a glass pony bead, and tie a second knot. Leave a gap for a hook, then tie another knot, add a second bead, and tie a final knot before trimming off the extra yarn.

***Note: For my scarf ornament, I used the sport weight yarn for the blue body of the scarf, but for the contrasting bronze stripes I used 2 strands of Lion Brand Bonbons sparkle, held together.  In my case I used brown & copper to get my bronze color.  The Bonbons are a very fine/light weight yarn that was much thinner than the sport weight, but was just about equal when using 2 strands at once.