Showing posts with label sewing. Show all posts

Tuesday, September 8, 2020

Bigfoot Throw Pillow

This was created for TheMistressT, in the Secret Modmirer Swap on Lettuce Craft.  MissT loves Bigfoot, and has a very woodsy guest room.  I used all scrap fabric and a zipper from my stash for the front.  

The back fabric was purchased from Spoonflower, and I fussy cut it to get a nice stripe of green along the back of the pillow.  


Bigfoot himself is made of flannel, so he's soft to pet.  The trees are quilting cottons from previous projects, including the brown branch pattern, which is the border to a quilt my husband & I made together when we were dating.


Friday, May 8, 2020

Love One Another Prayer Flags

Before joining the Prayer Flag swap for the first time, I decided to make some practice flags for a few friends I was supposed to see in March.  Sadly our get together was cancelled, but I was able to send them their flags.  I made 8 of the same one. 

They were machine sewn onto the backing fabric, which was a dictionary page with definitions of the word Love on it.  The text was stamped onto muslin, then gone over with a sharpie since I was out of fabric markers and didn't want to order one during the pandemic.  The wooden heart buttons were also sewn on with my machine.  (Goodness I love my Viking!)  The fibers along the bottom are a mix of yarns and lace in my stash and some skeins pottermouth brought me on her way through in early March.  Each had the recipient name on the back, along with the song lyric that was stuck in my head while working on them. 

Come on people now
Smile on your brother
Everybody get together
Try to love one another
Right now.

Wednesday, March 4, 2020

D&D Convention Badge Holders

These badge holders have been on my To Make list for months now.  While browsing through Pinterest I saw the pattern come up from Kidgiddy on Etsy.  She designed them for quilting conventions, but I knew right away I had to make some for my husband to go to Gary Con, a Dungeons & Dragons Convention, this year.  He went last year and loved it, and even texted me from the event to say he definitely wanted to attend again. 
 
The inside features 2 zippered pockets.  I dug through my stash of mixed colored zippers and picked two that worked with the dungeon map and stone castle fabrics, all of which came from Spoonflower.  I figured the different colored zippers might also help when trying to remember which pocket you tucked the item you're looking for.
 
The back features a cell phone pocket, with room for a pen or pencil.  The whole thing is held closed with a pearl snap.
 
Since I was worried about trying out a new pattern with the specially ordered fabric, I made a practice one, for a friend of Jim's who will be coming over from Ireland for another D&D Con later in the year.
 
I was so thrilled to have finished these well in advance of the con at the end of March.  No last minute all-nighters!  Sadly Gary Con, like every other event right now, has just been cancelled.  So they will have to wait till Covid is under control or there is a vaccine in place for Jim to get to use them.

Wednesday, February 21, 2018

Scrappy Quilt-As-You-Go Basket & Scissor Sheath


I recently organized a Hooker's Only Swap on Craftster.  My partner was the very talented StudioANF.  She requested a rectangular basket for keeping a few skeins of yarn in.  This one was made with this pattern from the Bernina Blog, but instead of making the fabric sandwiches, then quilting, I did 2 large quilt-as-you-go panels, then cut the basket pieces out of them.


The basket holds about 4 skeins of average yarn, in this case Caron Simply Soft.  The color scheme came out of one of her Pinterest boards, which was filled with fabrics she liked.  I noticed that most of them were turquoise or teal, with bits of flamingo pink thrown in.  So I dug through my stash for anything that fit. 

I have to say that I'm thrilled with how the basket came out, and I'm glad my first attempt didn't work out, because this is much cuter. 


Studio also had a pair of scissors on her wishlist, which I picked up for her.  Since I made my quilted panels pretty big, I had a little leftover, and made a scissor sheath to match.  It is cut out as a heart, then folded in half, with one of the tops folded down and sewn in place, with some buttons as embellishment.  Tomorrow I'll share the stitch marker and yarn cutter necklace I made her to go with it.


Wednesday, January 10, 2018

Stash Busting Placemats with Tim Holtz Fabrics

I have had the same set of placemats on our table, since my husband and I got married 10 years ago.  They were a gift from my mom, whom I later found out, had stolen them from my brother.  Sort of.  Turns out he left some stuff at her house when he moved, and she decided he wouldn't want them anymore, and gave them to me.  I moved halfway across the country with them, only to get an angry call from my brother later.  Admittedly, I never bothered to mail them back.   Mostly because they were beaded, and unable to be folded up to go in a box.  But 10 years later, and the wooden beads they are composed of, are starting to fall off, and it's getting annoying.


In thinking about it, I realized how ridiculous it is that I've never bothered to MAKE myself a set, and it was time to rectify that.  I was inspired by TheMistressT's Humongous Stash-busting, Scrappy, Place Mat Project posted on Craftster,  so I dug through my stash, and came up with a layer cake of 12" squares of Tim Holtz fabrics that I found on clearance for about $6 at Joann's last year.  I sliced and diced them to various widths, mixed up the strips, and sewed them all back together.  Then I cross cut the large panels, laying in perpendicular stripes of black, before backing and quilting them.  The backing was cut 1" larger all the way around, and folded over to become a self binding. 


The backing and batting both came out of stash as well, so it was a good project for using up extra fabric, as well as those narrow bits of batting I always have left over from making quilts.  I'm pretty pleased with how they came out, and kinda can't wait to have friends over for dinner now.  I have some chunks of the strip panels left over, and I think I might make some mug rugs and coasters to match, since the dining area and living room are one big open room.


Tuesday, July 25, 2017

Sandwich Wrap Tutorial with Fusible Vinyl

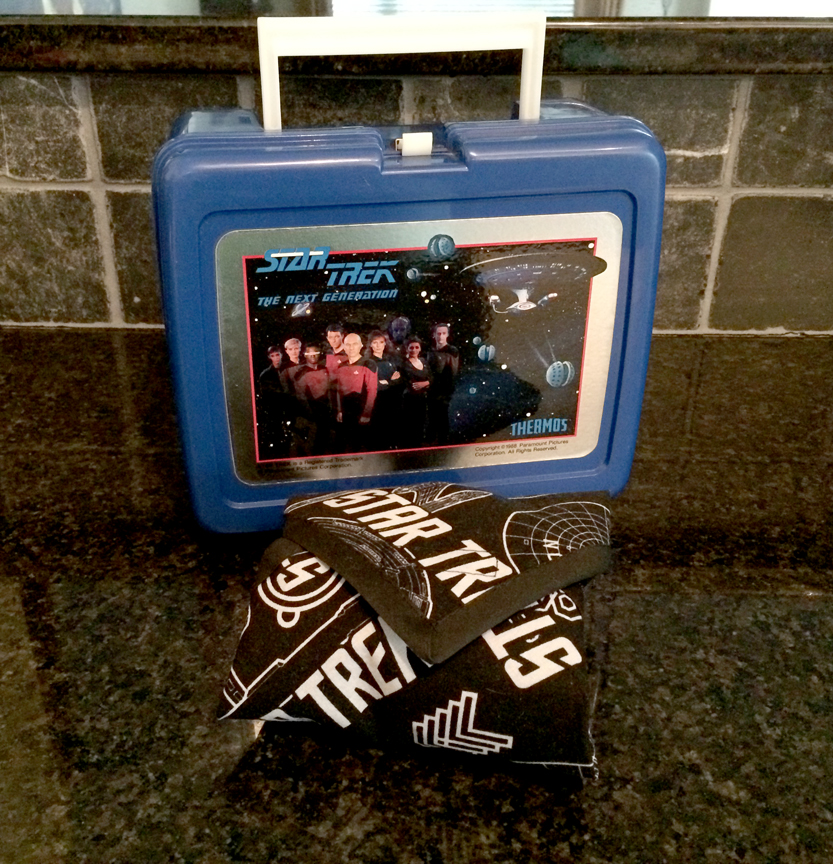
While watching Star Trek TNG on Netflix the other night, my husband sighed and said, "I kinda want a Star Trek lunch box to take to work.  I would be all about that."  Since he's a software developer, working at a somewhat eccentric software company, this would fit right in.  So, being an awesome wife, I pulled up eBay, and flipped around until I found a brand new, never-been-used Star Trek TNG lunch box from 1988.  Sold!  Best part, since it's brand new, the thermos doesn't even smell like old milk. 


All this got me thinking.  I already pack him a healthy lunch every day, consisting of a sandwich, cup of fruit, and bell pepper strips.  I put it in a reusable snap top plastic box rather than paper bags, and put the fruit in a silicone muffin cup which can be run through the dishwasher.  In the last few years I've been getting away from products that are bought simply to be thrown away, such as paper napkins, but I've still been wrapping his sandwiches in plastic wrap to keep them dry.  When I saw fabric sandwich wraps popping up all over Pinterest a few years ago, I thought I should make some for Jim, but never got around to it.  Ordering the lunch box was the push I needed to finally make some.  The fun part about this project is that the wraps can be made with any printed cotton fabric you like, so you can make them tailored to each family members interest.  They wipe clean, can be thrown in the washing machine, will last for ages, will keep plastic wrap out of landfills, and will save you money since you won't be buying a product that you're just going to throw out! 


Materials:
Printed cotton fabric
Fusible Vinyl (I used [url=http://www.joann.com/vinyl-fuse-15-in-x-2-yards/11385135.html]Pellon Vinyl Fuse[/url], but Heat'n Bond Iron-On Vinyl also works)
Velcro
1/2" Double Fold Bias Tape in a coordinating color
Polyester Thread
Ruler
Rotary Cutter or Scissors & Pencil

1. Start by cutting a 12" (30 cm) square of your fabric, and a 12" (30 cm) square of the Fusible Vinyl.  This is easy with a rotary cutter & mat, but easily can be done with a ruler, pencil & scissors if that's what you have on hand.  I didn't take a picture of this step, because if you have not learned to use a ruler to draw a square, then you aren't old enough to use a hot iron. ;)

Note: I'm going to give directions using Pellon Vinyl Fuse, but be sure to check the directions that come with whatever brand fusible vinyl that you've purchased.  Pellon also has a great video on their site showing how to use the product.  You can see it HERE.

2. Set your iron to a medium heat/wool setting.  Lay your fabric square with the printed side DOWN on your ironing board.  Remove the backing paper from your square of vinyl.  (Hang onto that paper!)  Lay the vinyl down onto the WRONG SIDE of your printed cotton, with the shiny side of the vinyl UP, and the sticky side DOWN. 

3. Place the paper on top of the vinyl, with the shiny/waxy side down against the vinyl.  Gently run your iron over the whole space quickly, to get the vinyl partially stuck, then starting at one side, place your iron down and leave it in place for 8 seconds.  Then pick up the iron and move it over to fuse the next segment, slightly overlapping your areas.  Leave for another 8 seconds, and repeat, until you've fused the whole area.  You will need to move your backing paper, in order to get every bit. 


4. Now flip the bonded fabric & vinyl over, and replace the backing paper.  Iron again from this side, holding the iron in place for 4 seconds, before moving on to the next area.  Voila!  You've successfully bonded your fabric and vinyl. 

5. Starting partway down one side, slide your bias tape over the raw edge of the cloth.  Instead of pinning through the vinyl, use quilting clips, hair clips or paper clips to hold the bias tape in place.  (Using pretty rainbow paper clips isn't necessary, but highly recommended.  Because, well... rainbows!)  If you're using scraps of bias tape, you may need to seem them together.  For tips on that check this tutorial.


6. Set the stitch length on your sewing machine to the longest possible setting.  On most machines this is a 3.5 or 4.  On my Viking that's a 6.  Stitch along the first side, stopping when you get to the end. 


7. Remove the piece from your machine, and fold the bias tape along the next side, mitering your corners as you go.  I was not able to use the paper clips to hold my corners in place, so I used a quilt pin for that area.  Start stitching again, and repeat around the remaining 3 sides.

8. When you get back to the beginning, cut your bias tape about 1" (2.5 cm) longer than where it would meet, the fold under the raw edge about 1/4" (5 mm), and sew it closed. 

9. Now it's time for velcro.  Cut a 2" piece, and separate the male and female sides.  (With velcro the 'male' half is the harsher, plastic side and the 'female' half is the softer, fuzzier side.  No, I didn't decide that.  It's a holdover from using snaps in sewing, where there is also a designated male and female side.)  Take the female side and lay it perpendicular to the corner, about 3/4"-1" (2-2.5 cm) down from the point on the RIGHT SIDE of your fabric.  Hold in place with paper clips, then stitch in place.

10.  Take the male half and lay it diagonally across the corner, on the opposite corner from your female velcro, on the WRONG SIDE of your sandwich wrap.  Hold in place with paper clips, then stitch in place.

11.  Make a delicious sandwich, and wrap it up in your awesome new reusable wrap.  Be the envy of all your friends when you go into work with a kick-ass Star Trek lunch box and matching wrap.  Accept compliments graciously.


Bonus: You can use your wrap like a placemat to enjoy your lunch on. 

A special thanks to FiberAlchemist for her help & advice on this project!  

Monday, July 6, 2015

A Bracelet With No Name

I've been working on putting together a sewing themed bracelet for the last few weeks, inspired by the totally kick-ass costume stitchers I've worked with over the years.  I had already gathered the charms, and Friday afternoon I finally had time to start putting them together.  The charms include a bobbin, iron, tape measure, buttons, safety pins, sewing machines, shears, "I <3 Sewing", a spool of thread, ruler, embroidery snips and a bobbin.


After getting all the charms together, I started racking my brains trying to come up with the perfect color scheme.  After much puttering, I finally settled on bright magenta, deep teal, jet black and a dark grey hematite.


The only thing missing now?  A name!  I haven't been able to settle on something for it.  I think I might have to poll some of my stitcher friends for their opinions.  How about it?  Any ideas?