
I really should have thought to take process pictures, so that I could create a tutorial, but I worked on them while listening to audio books on my phone/camera, so it slipped my mind! But I'll relate as much as I can remember.
It all started when I saw some adorable resin deer charms on Alpha Stamps website. As soon as I saw them I knew I wanted to create an ornament based on the Silver Doe.

Next I needed a base to build on. I tried peanut butter jar lids, but they weren't quite deep enough to create the underwater area for the Sword. I looked for a small wood or paper-mâché form to use at Joann Fabrics, but nothing was the right size, shape or depth in that department. My husband eventually found gift card tins in the Christmas aisle. Perfect size & depth!
Since I couldn't find any light colored ones, I spray painted the backs and sides silver. (I also spray painted the Does at the same time, because they were turquoise rather than silver.) After the paint was dry it was time to make the backs and sides snowy! I mixed a few drops of white paint into some glossy mod podge, then poured in a TON of white/translucent glitter, until I had a gloopy paste. The outside of the tin got 2 layers of this treatment with a purple-ish white glitter, then the final outer coat was done with a slightly more yellow-pink white glitter, so there is more depth to the snow, with the brightest layer on top, but the under layers peeking through.

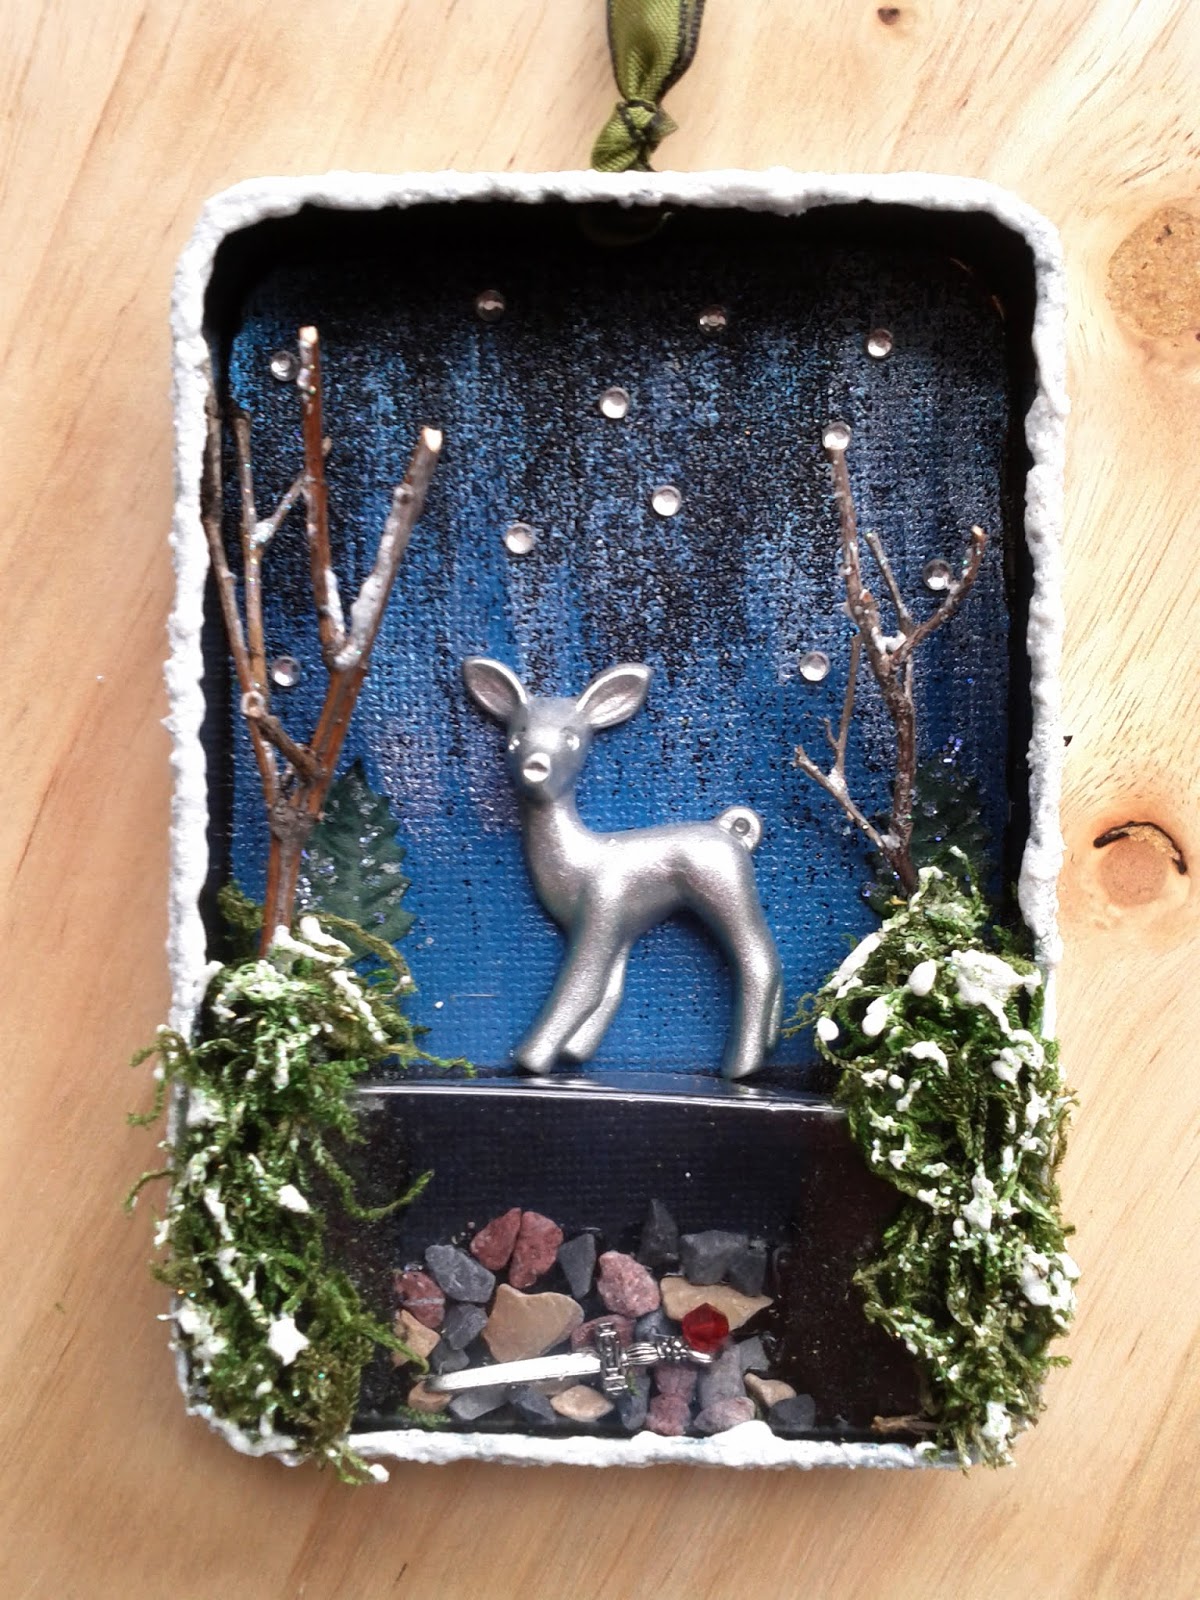
Next I cut a piece of deep blue cardstock for the back of each, and did a layer of silver mineral powder mixed with mod podge coming down from the top, fading out, and over that a layer of black glitter mixed into mod podge to add some depth and darkness to the sky. The stars are tiny self-sticking jewels from the scrapbooking section. I painted the inner sides of the tin with black enamel craft paint, then fitted the blue background papers into place.

The big problem was how to create an area that was "underwater", for the Sword to be resting in. I ended up cutting some floral foam to be the land area on the sides and painted it black. Then I glued some small pebbles onto the bottom, and part way up the back. (These were also from the floral section at Joann's.) The swords are charms from my stash, and I glued a tiny Swarovski crystal to the top of each, since the Sword of Gryffindor is set with rubies. Next I dug through the recycling and found some plastic packaging that was the right size & shape. I basically wanted an "L" shape of plastic, so the Doe could stand on the top of the pool, and the underwater area would be covered as well. I cut the plastic wider than I needed, hit the edges with some E-6000, and then stuck it into the floral foam.

Now that the underwater scene was set, I glued the Does in place, and added a layer of spanish moss to each of the banks, covering the edges of the plastic. After that was in place I walked around the grounds of our apartment complex until I found shrubs with branches the right size to be tiny trees. Each of the trees and the spanish moss got a light sprinkling of the mod podge-glitter snow. Finally I popped 2 holes in the top with jewelry hole punching pliers, and threaded through some iridescent olive green ribbon to tie in with the moss.
I have to admit that I lost heart in the middle of the project, worried that they were just NOT going to turn out as they existed in my imagination. But by the end I was thrilled with them, and sad to see them go. I wish I had thought to make 4 at the same time, to keep one for myself. I do have one of the Does left, so perhaps I will pick up another tin and do one for me. If I do, I'll be sure to take process pics and update this thread into a tutorial.