Tuesday, October 25, 2016

Annual Canning Adventures with Amber

It's finally autumn here in the South, and for me that means spending a few days with my friend Amber, canning ALL THE THINGS for Christmas gifts.  In my last two posts I shared the vanilla extract and limoncello that we made.  Now it's time for the canned goods.


The first recipe we did was Banana's Foster Butter, which comes from a 1 off magazine from Better Homes & Gardens, called Canning, Preserving + Freezing + Drying.  It came out in 2014 and is out of print.  However, some digging around on Amazon turned up a new book that BH&G put out last year called Better Homes and Gardens Complete Canning Guide: Freezing, Preserving, Drying, which does contain the recipe. After making 3 batches of it, I did tinker with the recipe a bit, so I've included my version.

Banana's Foster Butter

Banana's Foster Butter
8 ripe, firm large bananas
1 c granulated sugar
1 c packed brown sugar
1/3 c lemon juice
3 T rum
3/4 tsp ground cinnamon
1/4 tsp ground allspice

1. Place peeled bananas in a wide 5 qt heavy bottomed pot.  Using a potato masher, mash bananas until smooth.  Stir in sugar, brown sugar, lemon juice, rum, cinnamon & allspice.  Bring to boiling, reduce heat and simmer uncovered for about 20 mins, or until thickened, stirring frequently.

2. Ladle hot banana butter into hot sterilized half pint canning jars, leaving 1/4 inch headspace.  Wipe jar rims, adjust lids & screw on bands to fingertip tight.

3. Process filled jars in boiling water canner for 10 mins, starting timing when the water returns to a boil.  Turn off heat and wait 5 mins.  Remove jars from canner, and cool on a towel.  Leave jars undisturbed, and away from any draughts for 24 hours. 

4. After 24 hours check lids to make sure they've sealed. 


Honey & Lemon Jelly
While I normally pride myself on planning ahead for our canning adventures, this time around I had a major oversight.  Creating the double batch of limoncello called for 20 large organic lemons, but only utilized their skins.  Leaving us with the juice of 20 large organic, and *very expensive lemons* which we didn't want to waste.  So in the midst of our already large project, I added in a few extra recipes to help use up that juice.  A batch of Honey & Lemon Jelly and two different versions of Lemon Pickles. The jelly recipe came from Pomona's Pectin, and was so simple to make.  I used the option of 1 cup of honey, rather than 2 cups of granulated sugar.  The lemon flavor is bright and fresh, but the honey certainly comes through as well, tempering what might otherwise be too tart.  The batch made 4 1/2 jars, so I've been enjoying the partial jar.  It's lovely on english muffins and scones.  Now that I've tried this one, I want to give their Black Tea Jelly a shot.  

If you haven't tried using Pomona's Pectin yet, I really recommend it.  You are able to use very little sweetener, and sometimes no sweetener at all, making for much healthier recipes.  You are also able to use any variety of sweetener in each recipe such as honey, turbinado, demerara, moscavado, stevia or truvia.

Lemon Pickles - Ball Complete Book of Home Preserving
Then there were the Lemon Pickles.  The highly annoying pickles which had me grumbling by the time I finished them.  The first Lemon Pickles recipe came from the Ball Complete Book of Home Preserving, which called for 14 cups of cucumbers & 4 red bell peppers, and promised to make 6 pints of pickles.  Yeah, that didn't happen.  The brine created by the recipe was only enough to fill 3 very well packed jars of cucumber slices.  This is the first recipe that I've ever made from the Ball book that didn't come out as promised.  

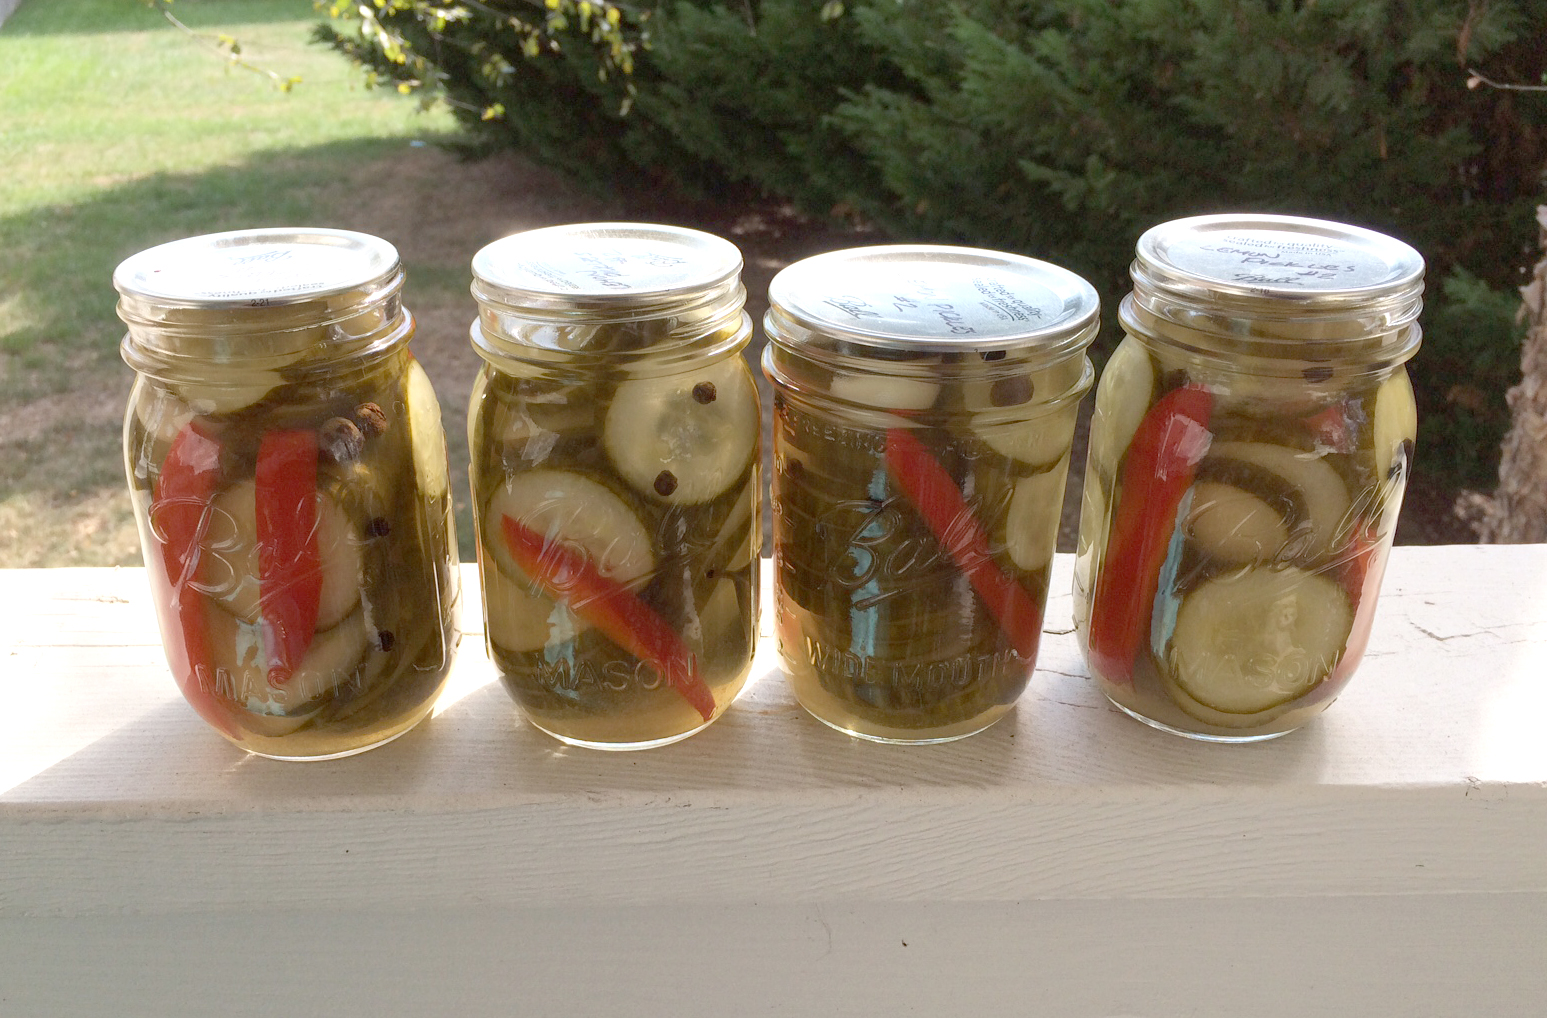
Lemon Pickles - From the Garden to the Table
So now I had about 10 cups of leftover cucumber slices and bell pepper strips, but I had used up the last of my fresh lemon juice.  I did some searching online and found an alternate recipe on the blog From the Garden Table, which called for bottled lemon juice.  I am quite happy to say that this recipe came out exactly as described, creating 4 more pints of pickles.  I haven't been able to taste either recipe yet, as both stated you should wait 6-8 weeks to let the flavors mellow before eating them. 

Lemon-Sage Wine Mustard
Now we were back to our regularly scheduled canning with a batch of Lemon-Sage Wine Mustard, from both the Ball book and freshpreserving.com.  This was a nice simple recipe that went together easily.  It made 6 jars, 2 of which didn't seal.  I used one of the unsealed jars to make a great Maple & Mustard Pork Loin, and it was wonderful.  It did make me realize however, that I seem to have a higher percentage of jars not sealing when making mustard, than any other type of canned food.  I'm really wondering why that is, since I carefully measure headspace and always wipe down jar rims.

Bourbon & Brown Sugar Mustard
Next we did a batch of Bourbon & Brown Sugar Mustard, which came from Kaela Porter of the blog Local Kitchen, by way of a guest post on the blog Food In Jars.  Even though it's highly popular, I have avoided the Food in Jars blog since I wasn't impressed with her first book or the fact that none of the recipes came out right when I tried it out in 2013.  But I decided to give her guest blogger a shot and I'm glad I did.  The mustard is delicious on a nice turkey & bacon sandwich.  

Sweet Onion & Maple Conserve
The last recipe we made was a double batch of the Sweet Onion & Maple Conserve that we made last year.  We noticed while making it, that it takes much longer than the 20 minutes indicated, for the onions to cook down and the liquid to evaporate.  In fact it took us a few hours!  The onions just continued to give up more and more liquid, and become softer and softer.  With all the liquid in the pot, uncovered and over a medium heat, it took about 2 hours for the liquid to cook off.  I did some investigating on the web, and this seems to be a problem for other home canners too.  No one seems to have come up with a solution for the problem, and it did eventually cook down enough, so my advice is to simply plan for this to be a lengthy process.  The conserve really is worth it.  I served it over a fantastic Maple & Mustard Pork Loin when we had friends over last week, and plan to use some more of it on burgers tonight.  The double batch made 10 jars, but 3 of ours didn't seal.

Anyone else canning anything this season?


Wednesday, October 12, 2016

Vanilla Extract

After starting our Limoncello, we also set up some bottles of vanilla extract to steep.  This is a super fast and easy gift, that nearly everyone can use.  Want to make your own?


You will need:
10-15 Vanilla beans of good quality
40 ounces inexpensive vodka
10 Small glass bottles

Wash your bottles with warm soapy water, and rinse well.  Allow to dry.

Once your bottles have dried, you will need to cut up your vanilla beans.  I cut mine in halves, but you can measure the length of your beans agains the size of your particular bottles.  We used one and a half beans for each bottle of extract.

Add your bean pieces to the bottles, and then use a funnel to fill each bottle with vodka.  Wipe down the bottles to make sure they are clean before labeling.

I used the same 2" square kraft paper labels from Avery, and a piece of free clipart for vanilla beans.  Since my printer only prints in black and white, I went back with a beige marker and gave some definition to the flowers.  Once the labels were on the bottles, they still looked a little plain to me, so I added a twine bow, along with a pewter charm of a cupcake to each one.


Note on supplies: We purchased our vanilla beans from My Spice Sage.  I've ordered spices from them in the past for canning, and the quality is always great.  (Plus on each order, they let you pick out a 1 ounce packed of spice to try for free, from an extensive list!)  Like with the Limoncello, I ordered my 4 oz amber Boston Round bottles from Specialty Bottle in Nashville.  They came exceptionally well packed, and shipped right away.  While it might be tempting to go with the clear glass, using brown bottles will actually help protect the extract's flavor from being destroyed by light.

Making Limoncello

I recently got together with my friend Amber, for our annual weekend of canning huge batches of Christmas presents.  While we did our usual canning of jams and mustards, we also did some homemade vanilla extract, and a double batch of limoncello.  I used to make liqueurs for holiday gifts every year, but somehow in the last few years I got out of the habit.  Clearly it's time to rectify that.


Here's how to make some of the limoncello for yourself.

To make 5 375ml (12.5) bottles, you'll need:
10 large, preferably organic lemons
1 750ml bottle of vodka
cheese cloth
2.5 cups water
3 cups sugar

Note on vodka:  Find a decent, drinkable vodka that you would use to mix cocktails with at home.  It doesn't need to be top shelf, but avoid giant plastic jugs that could double as paint thinner.  For this batch we used Smirnoff and Absolut.

Because the lemons will probably have a wax coating on them, you'll need to carefully clean that off, without destroying the essential oils in the peels that give the liqueur its flavor.  There are a few ways to clean lemons, including running boiling water over them, spraying them with a vinegar & water solution, or microwaving them for short burst of time, all of which help loosen the wax they are coated with.  Check out all the methods here on Wikihow.  We went with the microwave method.

Work with just a few lemons at a time, microwaving 3 for 10-20 seconds, on a microwave safe plate.  Take the warm lemons out, and scrub them with a vegetable scrub brush under cool running water. Give them a final rinse and they dry them with a clean tea towel or paper towels, before moving on to the rest of the lemons.

Once you have all your lemons de-waxed, it's time to peel them.  Use a vegetable peeler to remove the bright yellow peel, avoiding the white pith, which is very bitter.  Try to remove the peel in large pieces, rather than lots of tiny ones.  This will help when you strain the peels out, resulting in a clear liquid, rather than a dusty, murky one.

Divide your peels between 2 large, clean, quart jars.  (If doubling this recipe you can do it with 3 jars.)  Pour the vodka over the peels, and place in a cool, dark place for 10-12 days.  After just a few hours, if you swirl the jar, you can see that the alcohol has already turned a bright golden yellow.


Once the 10-12 days have passed, it's time to make the simple syrup that will sweeten the liqueur.  Place the sugar and water into a heavy bottomed sauce pan, and bring to a boil, stirring frequently to dissolve the sugar.  Once the sugar is fully dissolved and the liquid has come to a boil, turn off the heat and allow the mixture to cool for 30 mins to an hour.  Once it has cooled, line a colander with cheesecloth and place over a large bowl.  Pour the lemon steeped vodka through the cheese cloth, making sure to strain out all the bits of peel.  Discard the peels.  Add the lemon vodka to the syrup, stirring gently but thoroughly.


Pour your liqueur into clean bottles, and cork.  Wipe down the bottles to make sure there's no sugary liquid on them, then allow to dry before labeling.  For my batch, I used 2" square kraft paper labels from Avery.  You can design your labels with their online software and print them at home.  I added some pretty lemon branch graphics from the Graphics Fairy.  Since I only have a black and white printer, I used a yellow marker to add a hint of color to the lemons on the branches.  Once the labels were on the bottles looked a little plain to me, so I added a twine bow, along with a pewter charm of a lemon slice to each bottle.


Note on packaging your sunshine elixir: We used 375 ml woozy round glass bottles with T top corks, from Specialty Bottle in Nashville.  A single batch of this recipe will fill 5 of these bottles, with a scant few ounces left over for you to sample. (A little over 1875 ml, or 64 ounces.) Of course you can also use larger or smaller bottles for your limoncello, and little simple math will help you determine how many you need.


Friday, October 7, 2016

Gather Ye Rosebuds Halloween Wreath

In May of this year my husband and I bought our first house.  For the last several months we've been getting settled in, decorating our new space bit by bit.  We've mostly worked on the interior, since summer in the South is too brutal to take on outdoor projects.  Now with the weather finally cooling down, I've been able to enjoy regular morning walks around the neighborhood with the puppy.  On our walks I've loved seeing people out in their yards, decorating for fall.  There are pumpkins and mums on every front porch, and one house covered in caution tape and spiderwebbing.  All of it has made me want to decorate our house too.  So where to start?  How about at the front door, with a creepy Halloween wreath to welcome visitors into our home?


I looked around at some of the wreaths for sale in the regular craft and home decor stores, but they were all either incredibly expensive or very poor quality.  So I decided to make one myself, to keep the cost down by the quality high.  This is the result!  I'm calling it my Gather Ye Rosebuds Wreath, and it makes me very happy hanging on my front door.  Best of all, it only cost $16.50 to put together!  Want to make one yourself?  Well then let me show you how...


You'll need:
18" burlap wrapped straw wreath base, like this one at Joann's (which I bought with a 50% off coupon)
3-4 packages of 'creepy cloth' from Dollar Tree
4 stems of black roses from Dollar Tree
2-3 stems of purple roses from Dollar Tree
Small skull from Dollar Tree
Hot glue gun
Glue sticks
Black marker
1 yard black satin ribbon (optional)
Indoor/Outdoor Command Hook (optional)


Use your marker to draw lines dividing your wreath base into quarters.  This will help you keep track of how much creepy cloth you are using to wrap around the base.  Next, open your packages of creepy cloth, and completely unfold them.  Mine were 30"x72", which sounds like a lot of cloth until you remember just how thin it is.  Gather the cloth roughly at an angle near one end.  By holding it at an angle, you will taper out one piece, while you overlay the next piece, allowing you to get good coverage, without lumps where one piece ends and the next begins.  Use a line of hot glue to attach the cloth along the back of the wreath.  Now wrap the cloth, stopping to adjust so that you don't have bare patches peeking through.  As you come to the end of the first piece, add a line of glue, and simply start wrapping the next piece over the end of the last one.


I bought 4 piece of creepy cloth, but only ended up using 3 to cover my wreath.  (I guess that 4th one will decorate my mantle!)  Don't worry if there are some ragged bits or stray strings here and there.  It just adds to the death shroud texture that we're aiming for.  Now it's time to start laying in the roses.  Remove the roses, leaves and any other bits from the flower stems.  (Mine came with a glitter covered spider or bat on each bunch.)  You'll want to remove the plastic pieces from the leaves, but not from the roses, or those will fall apart.  Decide where you would like your skull to be.  I wanted mine centered at the bottom of the wreath, with roses running up along the sides.  Give yourself a mark for the placement of the skull, but don't attach it yet.  Instead glue a black rose on each side of where the skull will be, crowding them in closer than you think you'll want them.  Add two more black roses beneath those so that the center feels full.  Now go ahead and glue in your skull, taking care to nestle it between the flowers, so it seems to be emerging from beneath them.


Now that you have your skull in place, it's time to lay in some leaves.  Use more hot glue to lay some of them flat, hanging just off the edge in either direction, partway up each side of the wreath.  This will help fill in any gaps between the roses with additional texture.  Now let's add in a purple rose on each side, between the black roses already there.  Continue layering in more roses in black with the occasional purple one thrown in to break up the color.


My roses also came with little feathery bits of plastic on the ends of the stems.  Cut these apart, and add a blob of glue to the ends, tucking them between the flowers and leaves, and place them around the wreath.  I added mine feathering off the top edges of the roses on the sides, behind where I wanted my skull, and along the bottom edge of the wreath.  Now take a look at your skull.  Mine had some paint on it, darkening the eye sockets but it wasn't very dark.  Use your magic marker to add some definition between the teeth, and along any cracks in the skull.


That's it!  You now have a chic new Halloween wreath.  Very Martha Stewart.  If Martha decided to move to a Mockingbird Lane.   I had planned to hang mine from a metal over-the-door wreath hanger, but couldn't find it in the holiday decorations.  Since none of the stores in town seemed to have them yet either, I grabbed an outdoor Command Hook from Big Lot's, and hung the wreath from a loop of black satin ribbon.


Now I clearly need something more fun and festive for the welcome mat.  Wonder what I can come up with for that...