Showing posts with label canning. Show all posts

Tuesday, August 1, 2017

Calhoun Peach & Sweet Basil Jam

This past weekend my husband and I headed up to his parents home in southern Illinois to visit friends and family.  Each summer when we go up, we pass roadside stands selling Calhoun peaches.  When I inquired about the signs a few years ago, my husband told me that the peaches grown in Calhoun county are famous for being extra sweet and delicious.  Apparently the area they are grown in is between two rivers, the Illinois and the Mississippi, where moisture from the waters and the limestone bluffs seeps into the soil to make the peaches much more flavorful.  So on our way out of town on Sunday we stopped at a roadside stand so I could get some peaches to can.  This was the result!  The clean herbal flavor of the basil balances the bright sweetness of the peaches.  It made 7 half pint jars, plus 1.5 freezer jars leftover for me.  I enjoyed it equally on toast this morning, and on vanilla ice cream last night. 


Calhoun Peach & Sweet Basil Jam

Ingredients
7 cups sugar
4 cups finely chopped, peeled Calhoun peaches (or whatever peaches you have locally)
1/4 cup bottled lemon juice
1 pouch liquid pectin (3 oz)
3/4 cup finely snipped fresh sweet basil (I like to roll it up and snip it with kitchen sheers)

Prepare a hot water bath canner & 7 half-pint jars. 

In a 6-8 qt pot combine the sugar, peaches and lemon juice.  Bring the mixture to a full rolling boil, stirring constantly until the sugar is dissolved. 

Quickly stir in the pectin.  Return to a full rolling boil, stirring constantly.  Boil for 1 minute. 

Remove from heat.  Skim foam from the top with a metal spoon, and stir in the basil.

Ladle the hot jam into hot sterilized half-pint canning jars, leaving 1/4" head space.  Wipe the jar rims, adjust lids, and apply screw bands until fingertip tight.

Process filled jars in the water bath for 5 minutes.  (Start timing once the water returns to boiling.)  Turn off heat and remove lid from canner, leaving jars in the water an additional 5 minutes.  Remove the jars to a folded kitchen towel, and allow to rest away from drafts for 24 hours.

Tuesday, October 25, 2016

Annual Canning Adventures with Amber

It's finally autumn here in the South, and for me that means spending a few days with my friend Amber, canning ALL THE THINGS for Christmas gifts.  In my last two posts I shared the vanilla extract and limoncello that we made.  Now it's time for the canned goods.


The first recipe we did was Banana's Foster Butter, which comes from a 1 off magazine from Better Homes & Gardens, called Canning, Preserving + Freezing + Drying.  It came out in 2014 and is out of print.  However, some digging around on Amazon turned up a new book that BH&G put out last year called Better Homes and Gardens Complete Canning Guide: Freezing, Preserving, Drying, which does contain the recipe. After making 3 batches of it, I did tinker with the recipe a bit, so I've included my version.

Banana's Foster Butter

Banana's Foster Butter
8 ripe, firm large bananas
1 c granulated sugar
1 c packed brown sugar
1/3 c lemon juice
3 T rum
3/4 tsp ground cinnamon
1/4 tsp ground allspice

1. Place peeled bananas in a wide 5 qt heavy bottomed pot.  Using a potato masher, mash bananas until smooth.  Stir in sugar, brown sugar, lemon juice, rum, cinnamon & allspice.  Bring to boiling, reduce heat and simmer uncovered for about 20 mins, or until thickened, stirring frequently.

2. Ladle hot banana butter into hot sterilized half pint canning jars, leaving 1/4 inch headspace.  Wipe jar rims, adjust lids & screw on bands to fingertip tight.

3. Process filled jars in boiling water canner for 10 mins, starting timing when the water returns to a boil.  Turn off heat and wait 5 mins.  Remove jars from canner, and cool on a towel.  Leave jars undisturbed, and away from any draughts for 24 hours. 

4. After 24 hours check lids to make sure they've sealed. 


Honey & Lemon Jelly
While I normally pride myself on planning ahead for our canning adventures, this time around I had a major oversight.  Creating the double batch of limoncello called for 20 large organic lemons, but only utilized their skins.  Leaving us with the juice of 20 large organic, and *very expensive lemons* which we didn't want to waste.  So in the midst of our already large project, I added in a few extra recipes to help use up that juice.  A batch of Honey & Lemon Jelly and two different versions of Lemon Pickles. The jelly recipe came from Pomona's Pectin, and was so simple to make.  I used the option of 1 cup of honey, rather than 2 cups of granulated sugar.  The lemon flavor is bright and fresh, but the honey certainly comes through as well, tempering what might otherwise be too tart.  The batch made 4 1/2 jars, so I've been enjoying the partial jar.  It's lovely on english muffins and scones.  Now that I've tried this one, I want to give their Black Tea Jelly a shot.  

If you haven't tried using Pomona's Pectin yet, I really recommend it.  You are able to use very little sweetener, and sometimes no sweetener at all, making for much healthier recipes.  You are also able to use any variety of sweetener in each recipe such as honey, turbinado, demerara, moscavado, stevia or truvia.

Lemon Pickles - Ball Complete Book of Home Preserving
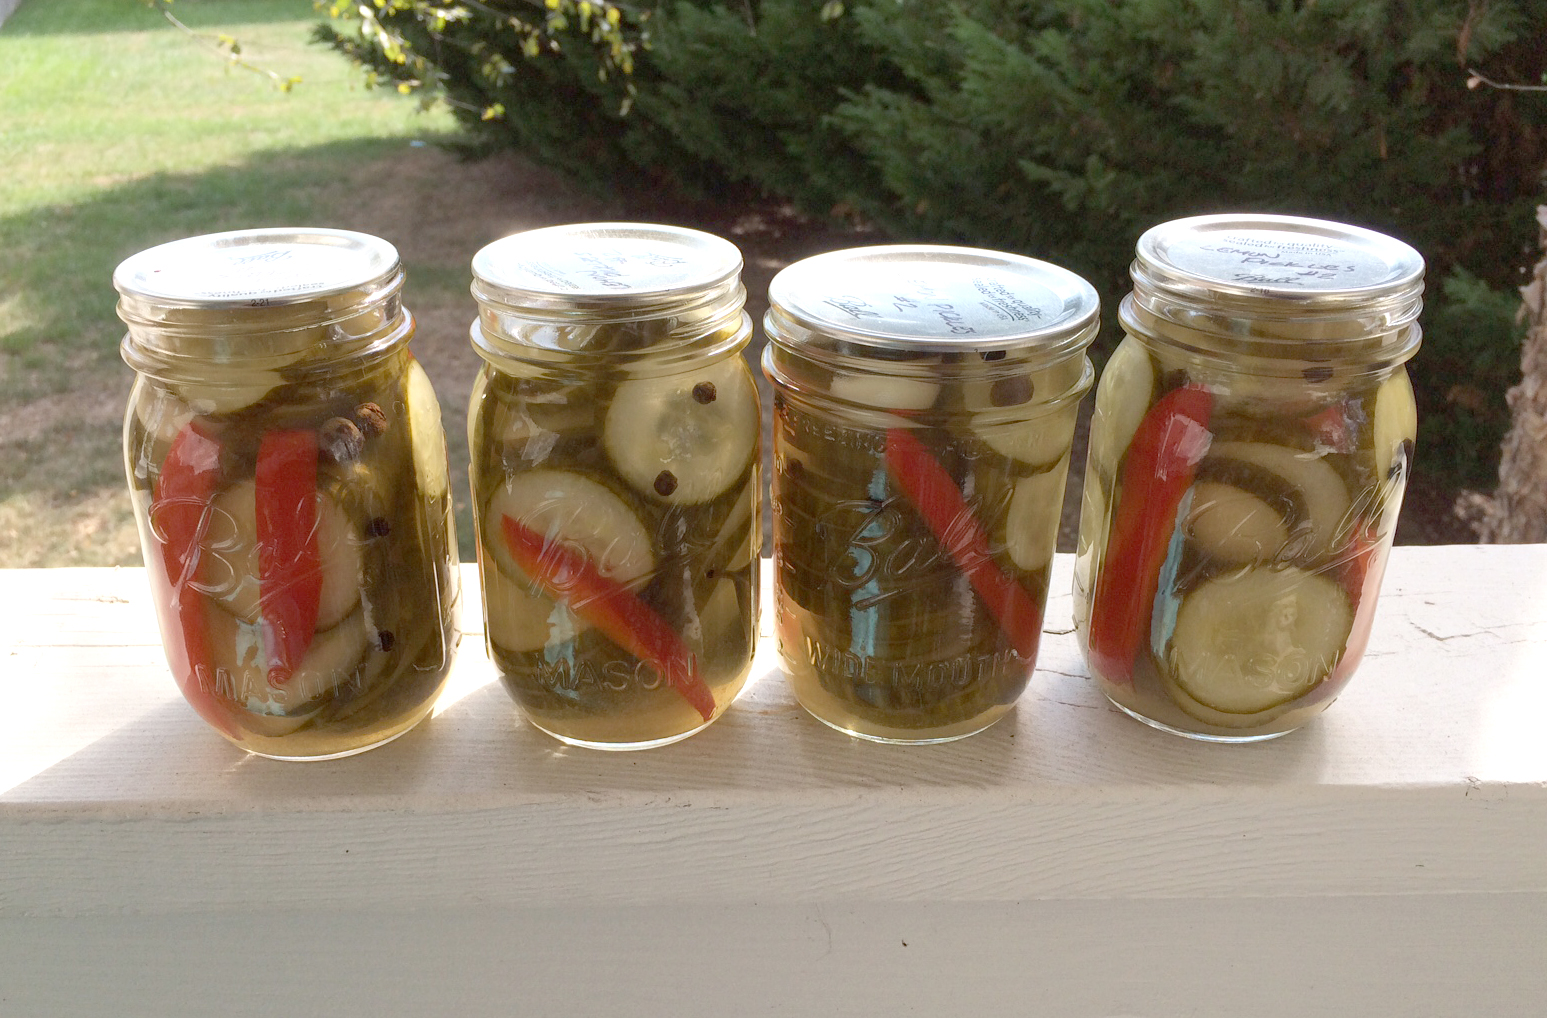
Then there were the Lemon Pickles.  The highly annoying pickles which had me grumbling by the time I finished them.  The first Lemon Pickles recipe came from the Ball Complete Book of Home Preserving, which called for 14 cups of cucumbers & 4 red bell peppers, and promised to make 6 pints of pickles.  Yeah, that didn't happen.  The brine created by the recipe was only enough to fill 3 very well packed jars of cucumber slices.  This is the first recipe that I've ever made from the Ball book that didn't come out as promised.  

Lemon Pickles - From the Garden to the Table
So now I had about 10 cups of leftover cucumber slices and bell pepper strips, but I had used up the last of my fresh lemon juice.  I did some searching online and found an alternate recipe on the blog From the Garden Table, which called for bottled lemon juice.  I am quite happy to say that this recipe came out exactly as described, creating 4 more pints of pickles.  I haven't been able to taste either recipe yet, as both stated you should wait 6-8 weeks to let the flavors mellow before eating them. 

Lemon-Sage Wine Mustard
Now we were back to our regularly scheduled canning with a batch of Lemon-Sage Wine Mustard, from both the Ball book and freshpreserving.com.  This was a nice simple recipe that went together easily.  It made 6 jars, 2 of which didn't seal.  I used one of the unsealed jars to make a great Maple & Mustard Pork Loin, and it was wonderful.  It did make me realize however, that I seem to have a higher percentage of jars not sealing when making mustard, than any other type of canned food.  I'm really wondering why that is, since I carefully measure headspace and always wipe down jar rims.

Bourbon & Brown Sugar Mustard
Next we did a batch of Bourbon & Brown Sugar Mustard, which came from Kaela Porter of the blog Local Kitchen, by way of a guest post on the blog Food In Jars.  Even though it's highly popular, I have avoided the Food in Jars blog since I wasn't impressed with her first book or the fact that none of the recipes came out right when I tried it out in 2013.  But I decided to give her guest blogger a shot and I'm glad I did.  The mustard is delicious on a nice turkey & bacon sandwich.  

Sweet Onion & Maple Conserve
The last recipe we made was a double batch of the Sweet Onion & Maple Conserve that we made last year.  We noticed while making it, that it takes much longer than the 20 minutes indicated, for the onions to cook down and the liquid to evaporate.  In fact it took us a few hours!  The onions just continued to give up more and more liquid, and become softer and softer.  With all the liquid in the pot, uncovered and over a medium heat, it took about 2 hours for the liquid to cook off.  I did some investigating on the web, and this seems to be a problem for other home canners too.  No one seems to have come up with a solution for the problem, and it did eventually cook down enough, so my advice is to simply plan for this to be a lengthy process.  The conserve really is worth it.  I served it over a fantastic Maple & Mustard Pork Loin when we had friends over last week, and plan to use some more of it on burgers tonight.  The double batch made 10 jars, but 3 of ours didn't seal.

Anyone else canning anything this season?


Wednesday, October 28, 2015

Autumn Canning Adventures

I promised that this blog would include all my crafty endeavors, and yet I seem to have mostly posted just my jewelry projects lately.  Though I've been making lots of jewelry in preparation for the holidays, I took 2 days off last week to spend some time canning with my good friend Amber.  I love Amber for a lot of reasons, but our relationship is probably best summed up by the following card.


And while most of our time together involves a few drinks and hours of snarky conversation, we also always manage to get a whole lot of work done at the same time.  This past visit was no exception.  We made five canning recipes; 2 which were old favorites and 3 that were new to us.  I will admit right now that I didn't take any fancy staged photos of ingredients or the cooking process.  After all, I am not a food blogger, but rather a craft blogger.  I will however provide sources or links to all the recipes.


The first project was  a batch of Red Wine Jelly from the Ball Complete Book of Home Preserving.  I really can't say enough good things about this book, and the recipes in it.  It contains 400 recipes, all of which sound delicious, and all of which have been tested repeatedly, so you know they work every time.  (One of the reasons that I love this particular recipe is that it calls for exactly one bottle of wine, while many others call for 1/2 cup from a second bottle.)  I used my current favorite wine, Apothic Dark, which has blackberry, blueberry, coffee and dark chocolate notes in it.  Remember that the flavor will become more concentrated and cerntainly much sweeter with the addition of sugar.  I've also done this with a Norton wine from local winery, Reid's Livery from Alvaton, KY, which might be my favorite jelly ever due to the strong and complex flavors of the wine.  


Our next recipe was Dilly Beans, from the blog Food In Jars.  These were requested by Amber's brothers.  We made them 2 years ago, and apparently the boys have been asking for more ever since then.  They are a great way to use up lots of green beans from your garden, and produce a bright and intense dill and garlic pickle.  Amber brought some of the beautiful green Heritage Collection Jars, and the bright green beans look extra pretty in them.


While we were working on the Dilly Beans, we set the basil to steep for a batch of Basil Jelly, from the blog Sweet Domesticity.  If you check out the recipe you will see that mine did not come out the bright green color that Maria's did.  As noted in the comments section of her post, it seems that the variety of basil you use, as well as how you prepare it, can vary the color.  As the recipe has a strong lemon flavor to it, I love the golden honey color of my finished jelly.  We procured our basil from Kroger, as my tiny patio garden didn't produce enough basil for this recipe.  Hopefully I'll have a bigger garden to pick from next summer. 

I should also note that the photos from Maria's blog looked to me like 4 oz jars, but the recipe states that it makes 5 half-pints (8 oz. jars).  Since I was a bit confused, I posted a question about it in the comments section, and Maria got right back to me to let me with an answer!  The jars in her photos were actually wide mouth 8 oz jars, that just happen to look like the 4 oz variety when there is no other frame of reference in the photos.  Thanks for your help Maria!  


The jelly is fantastic.  Bright from the lemon and a beautiful herby basil flavor that I adored.  Our batch came out just shy of 5 half-pints, so I kept the open jar for myself, and have enjoyed it on toast, as well as on some glazed salmon I made on Monday.  I was able to use up some of the leftover garlic, onions, and green beans in the Vegetable Risotto as well.  I will definitely be making this jelly again next year.


After lunch Amber and I did a batch of Pear & Ginger Jam, from the blog Savvy Eats.  According to the post, this recipe was adapted from the book Canning for a New Generation, so I've included a link to the book on Amazon as well.  This recipe made a thick and chunky jam, that was sweet from the pears, but has a nice kick of heat from the ginger.


Our final recipe during this crazy day of canning was for Sweet Onion & Maple Conserve.  The recipe comes from a single issue magazine I bought last summer called Better Homes and Gardens Canning+Preserving+Freezing+Drying.  Since it would be very hard to find I've linked to the recipe for it that I shared in the Harry Potter Craftalong over on Craftster.  This stuff is utterly fantastic, and I want to put it on everything.  The onions and maple syrup are very sweet, but are tempered by the butter and fresh thyme, which came from my herb garden.  The recipe states that it will make 5 4oz. jars, but our batch would have filled 6.  We filled and processed 5 jars, one of which apparently wasn't closed well enough and came open during canning, spewing onions all over my canner.  When we realized that we still had more of the golden goodness, we filled an extra jar to be used right away.  That jar is already gone.  How you ask?  Burgers, with aged sharp cheddar, bacon, and this conserve on toasted sourdough.  I regret nothing.


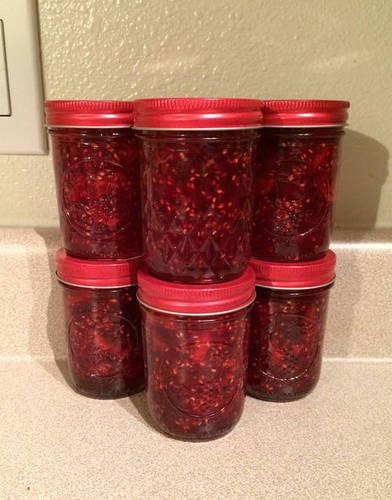
After all that canning, I somehow still was up for making one last batch of jam on Monday.  Since I had some leftover liquid pectin, and raspberries were on sale over the weekend, and my New England heart believes cranberries are a year round food, I did a batch of Cran Raspberry Preserves.  The recipe is also from the Ball Complete Book of Home Preserving.  This jam tastes like Thanksgiving in a jar.  The tart cranberries are softened by apples, honey, and the bright sweetness of raspberries.  I love traditional raspberry jam, but I don't like too many seeds.  (I'm complicated.)  I loved the consistency of these preserves.  Spreadable, with some chunks, bright red, and just the right amount of seeds.  Just for fun I used the red lids and bands from Ball that I found in Kroger.  They also had purple in store, and blue and green are available online, either from Ball or Amazon.

For now, I'm taking a bit of a break from canning to get back to crafting for my shop, and hopefully writing some more here, but I'm sure I'll be making a few more recipes for holiday gifts.  My mom has already asked for some of the Cranberry Mustard that I made for the last two years, and since clementines always start appearing in stores at this time of year, I'm contemplating Mandarin Oranges in Ginger Syrup.

Sunday, August 25, 2013

Overcoming a Fear of Canning - or What I Did on My Summer Vacation

For the last few summers I have wanted to try my hand at home canning & food preserving. But like many other folks have said, it just seemed like such a colossal project. What if I got it wrong and made someone sick? What about the cost of materials? It just seemed overwhelming.

But, thanks to Craftster friends, I decided to face, and ultimately overcome, my fears of canning. I set myself the challenge of learning about canning overall, and to complete a few projects in some classic home preserving categories. My original plan was to create 7-11 projects, including 2-3 infusions, 2-3 pickles, 1-2 condiments, 2-3 jams/jellies/syrups, and 1-2 dry goods mixes.  In the end, I went a bit beyond that! In fact, I doubled my plan. I ended up spending just over 40 hours, making 20 individual projects, which totaled 105 jars & bottles of food!

The photo below shows just one jar of each project.

Here's a list of all the projects, broken down by type of food. Whenever possible, I have linked to either the recipe I used, or to the book the recipe came from.

Infusions: Completed 2 projects
Red Raspberry Vinegar from Put ‘Em Up! 
Blackberry Bourbon from Put ‘Em Up! 

Pickles: Completed 5 projects
Bread & Butter Pickles - 6 quarts, from Ball Pickling Spice directions
Cucumber Dill Spears - 2 quarts, from Ball pickling spice directions
Pickled Carrots & Parsnips - 3 pints, from Put ‘Em Up! 
Zucchini Pickles - 8 pints, from Food In Jars
Pickled Brussels Sprouts - 4 pints, from Food In Jars


Salsas: Completed 3
Heirloom Tomato Salsa - 3 pints, from Put ‘Em Up!
Garden Salsa - 5 pints, from Ball Complete Book of Home Preserving
Jalapeno Salsa - 6 half-pints, from Ball Complete Book of Home Preserving


Condiments: Completed 4
Bruschetta - 2 batches of 8 half-pints, from Ball Complete Book of Home Preserving
Boston Lager Mustard - 4 pints, DONE on 8/2/13 (Adapted from Oktoberfest Beer Mustard Recipe)
Zucchini & Pepper Relish - 5 pints, from Ball Complete Book of Home Preserving
Caramelized Red Onion Relish - 3 pints, from Food In Jars

Jams & Preserves: Completed 5 projects
Norton Wine Jelly - 4 half pints, from Ball Complete Book of Home Preserving
Cranberry Syrup - 4 half-pints, from Food In Jars, DONE on 8/2/13
Mojito Jelly - 4 half-pints
Mimosa Jelly - 6 half-pints
Low-Sugar Blueberry & Champagne Jam - 3 half-pints, adapted from Ball Pectin Packaging Recipe

Dry Goods Jars: Completed 1 project
Cajun Seasoning Blend - 12 batches of 1/2 c. each, DONE on 8/24/13

MistressJennie's Cajun Seasoning Blend
Makes one .5 cup batch (I multiplied this by 12)

3 T Salt
1 T Paprika
1 T Onion Powder
1 T Cayenne
1/2 tsp White Pepper 1 1/2 tsp Thyme
3/4 tsp Black Pepper 1/2 tsp Oregano


Finally, I will leave anyone who is still reading this, with a few words wisdom for those who wish to delve into canning.

#1. Get the Ball Complete Book of Home Preserving. It is totally affordable from Amazon, but you can also certainly find it at your local library.

#2. Read everything about the canning process first. And read about it in the Ball Book. Their recipes have been tested and perfected. If you find a shiny looking book full of pretty pictures by someone else, by all means, check it out too. But consider the Ball Book the bible of canning. Everything I made out of it came out exactly as described.  (I have also had very good luck with Better Homes & Gardens canning publications.)  Read it a few times, so it's ingrained, then you won't be as scared of making a mistake mid-project.

#3. Read the whole recipe you are about to create. Double check to have everything you need before you start. Then read the whole darn thing through again, just to be certain.  I like to start my canning adventures with a clean kitchen.  I do any dishes the night before, and make sure to wipe down my counters before I start.  Then I pull out my canner, and all the ingredients.  I measure out everything before I start cooking anything.  If everything is clean and organized and in place, you won't be scrambling to measure the sugar, with a pot of fruit bubbling over on the stove.

#4. Start with something simple, that you won't mind eating all of right away, if the jars somehow don't seal. And something that doesn't require expensive ingredients. If you are growing a pot of tomatoes on your deck, or your neighbor gives you 30 zucchini, try something like salsa or zucchini pickles.  Bananas Foster Butter cost me all of $4 in ingredients.

#5. Before buying a giant canner, check to see if a friend or relative has one you can borrow.  While you're at it, see if anyone in the family has mason jars they'll let you have. You will need to buy new lids and bands, but they are *much* cheaper than buying whole brand-new jars.  If you want to try small-batch canning (2-4 jars of food at a time) you can use any regular stock pot you have, provided it holds enough water to cover your jars by 2-3 inches, and get the the Preserving Starter Set from Ball, which runs about $15.  It will totally be everything you need to do a few small batches to see if you like canning and you will use the jar lifter tongs, lid wand, and headspace tool for large batches too.

#6. When the pandemic is over: Go to your local farmer's market, and see if they are offering any canning classes, or canning supplies & coupons. My market has been doing classes throughout the summer, and their organizer booth has been handing out huge amounts of coupons. The individual vendors themselves have also been giving away batches of pickling spice & salsa spice mixes.  A mix is a great place to start. You won't have to shell out for multiple jars of individual spices, and can see if you like canning or not.

#7. Given the choice between trying jam or jelly first, try a jelly that doesn't require you to do any peeling/chopping/straining. There are lots of recipes that use pre-bottled juice, like Pomegranate Jelly, which uses Pom Juice. Once you see how easy a jelly like that can be, move on to more labor-intensive jam, or a jelly you have to chop & strain.

#8. Have fun, and give yourself permission to fail. Don't freak out if your jelly is a bit soft. Just pour it over ice cream and call it sauce. And don't worry if a few jars don't seal. Just use it up at home, or give it to friends to use right away. Out of the 105 jars I made this summer, about 10 didn't seal. It annoyed me at first, but then I tasted the stuff I made, and I didn't feel one bit bad about indulging in the delicious fruits of my labors. (Seriously, that Sam Adams Mustard is amazing on bratwurst. )

2020 Addendum:

#9. If your jars have not sealed, or the food has somehow gone bad, it will be ***obvious***.  If you open a jar and find mold, fuzz, see bubbling, or smell a nasty rotten smell, then your food is bad.  Dump it out.  You will never eat something you canned that looks, smells, & tastes great, and get sick.  It just won't happen.

#10. While you can reuse old jars, you do need new lids when canning.  Unused canning lids have a shelf life of about 5 years, after which the glue on the rim dries out, and prevents your jars from sealing.  If you don't know how long those lids have been open, toss them out, or use them as lids for things that don't need to be canned, like storage for buttons, or even cookie-mix-in-a-jar gifts.  Go get a fresh box for canning your awesome garden harvest.  They are cheap.  About $1.50 for 12.  I promise you it's worth it.

#11. This chopping tool actually works.  It's a lifesaver if you're making salsa, or anything else that requires dicing several pounds of produce.  I didn't think it would, but my friend Amber who does lots of canning with me, brought it over once, and it worked so well for us, she bought one for me for Christmas.