Wednesday, May 29, 2019

Silk Scale Mail Dice Bowl

I was at a loss as to what to make my husband for our anniversary this year.  It's our 12th, which is silk and linen.  He isn't into either for clothing or pj's as the internet suggests, but digging through my yarn stash I found some awesome silk yarn, and decided to make him a dice bowl for when he plays D&D.  I made up the pattern based on previous bowls I've created, and have included the pattern below for you.  It was created with a worsted weight (#4) silk roving from Darn Good Yarn, called Crimson Fire.  The scales came from the Ring Lord and are red, silver, and carbon.

Round 1: In Magic Ring, 6 sc.

Round 2: Sc increase in each st. (12 sc)

Round 3: 2 sc, sc around. (18 sc)

Round 4: 2 sc, sc in next two st around. (24 sc)

Round 5: 2 sc, sc in next three st around. (30 sc)

Round 6: 2 sc, sc in next four st around. (36 sc)

Round 7: 2 sc, sc in next five st around. (42 sc)

Round 8: 2 sc, sc in next six st around. (48 sc)

Round 9: Sc in back loop only, around. (48 sc)

Round 10 - 11: Sc in each st around. (48 sc)

Round 12: Do 1st round of scales.

Round 13: SC in each st around. (48 sc)

Round 14: Do 2nd round of scales.

Round 15: SC in each st around. (48 sc)

Round 16: Do 3rd round of scales.

Round 17: Sc in first st, sc two tog, sc in next 6 st, sc two tog; repeat around. (42 sc)

Round 18: Do a round of slip st along the outside edge of the bowl, to create a stronger lip.

Finish off, weave in ends.

Monday, May 27, 2019

Elise Shawl in Turquoise Silk


This shawl was made for jemimah in the Use the Good Stuff Swap, on Craftster.  I LOVE the excuse to look through my treasured pieces in my stash, and make something lovely for someone who will truly appreciate it.  The pattern is the Elise Shawl, and is a free download on Ravelry.  When I first saw it, I was a bit intimidated, as it looks intricate, but after an initial setup of 6 rows, you repeat the same two rows over and over until you get the size you want, then add a simple picot border. 

The yarn is Darn Good Yarn's sport weight silk in Caribbean Current.  I decided I wanted to highlight the purple and deep teal splotches in it, so I added some iridescent glass beads along the final row, in the picots and the single crochet directly above the previous double crochet post.

Blocked it came to 44" across and 22" deep at the center back, and I finished with just 12" of yarn leftover!

Monday, May 20, 2019

Strawberry Rhubarb Pie Hot Pad


This little hot pad/trivet was made as an extra for PerfectlyBohemian in the Great British Bake Off Swap.  I saw a version of it, and decided I just had to make one.  I mean, come on, how cute is a little pie made of yarn?  I used a free pattern from Yarnspirations for the overall look and the lattices, but I wasn't thrilled with their 'pie filling', so instead I used a Youtube tutorial by One Dog Woof about how to crochet the bobble stitch in the round. 

When I had what I felt was a big enough filling, I just crocheted a plain circle for the back, making sure I had enough increases to end my final row with the same number of stitches I had in the pie filling.  (Mine came to 80.) Then I went back to following the Yarnspirations pattern, reducing the number of lattices per side to 6, sewing the lattice pieces in place, and then crocheting both layers together and adding the fluted border.  It came out adorable, but I'll warn you, don't make it unless you like weaving in ends!  So many ends!

Saturday, May 11, 2019

Good Stuff Baskets


These baskets were made for jemimah in the Use the Good Stuff Swap on Craftster, hosted by craftylittlemonkey.  The idea of the swap is that life is short, so we should use the treasured craft supplies we would otherwise hoard, while we can. 

While digging through my stash of silk yarns, I came across these two bright skeins from two months worth of Darn Good Yarn's monthly subscription box.  I poked around Ravelry, trying to find some inspiration from other crafters.  I saw an awesome post from user marianheart, where she combined the same two skeins I was trying to, into some baskets, based on a pattern for a floor pouf. 

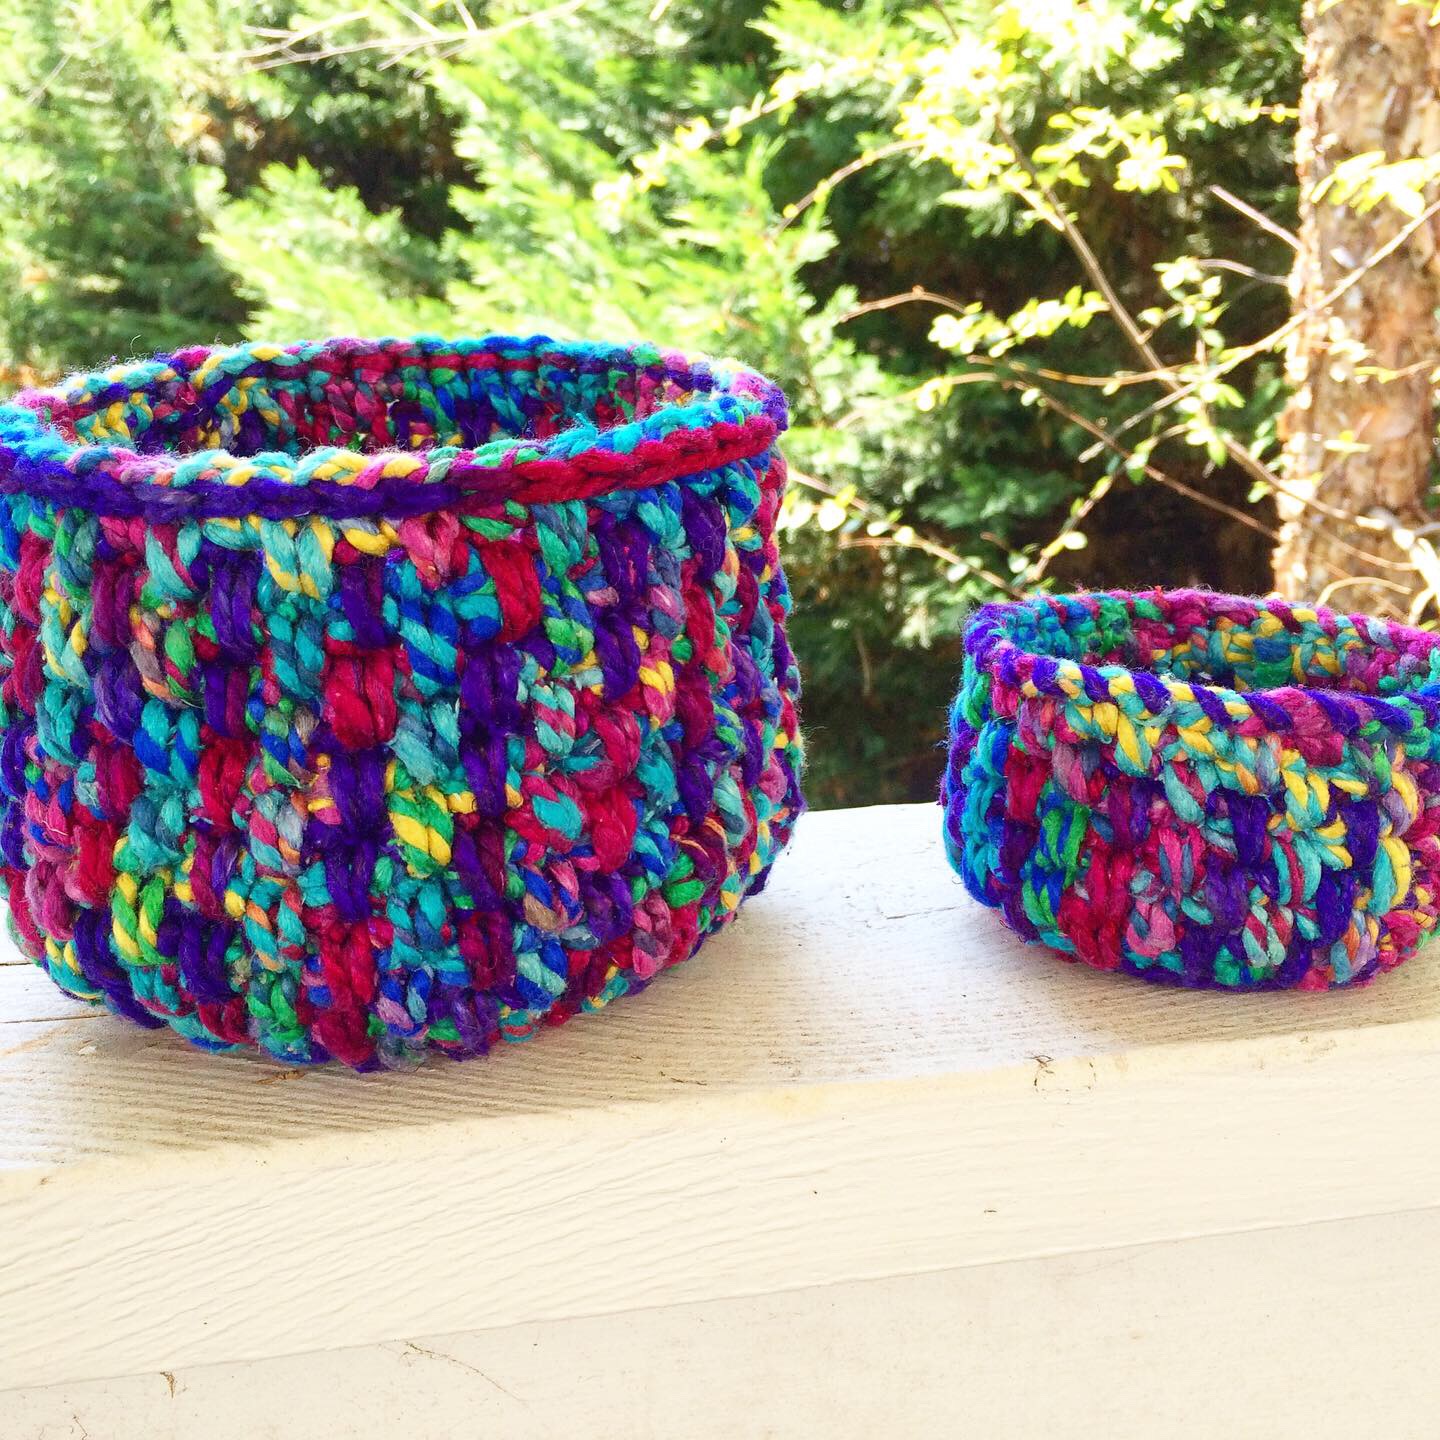
I decided I wanted to make something similar, and so I wrote my own pattern, using what I think is the same stitch (alternating spike stitch), but changing the base to one I've made a million times for bags and bowls.  I made a large and a small basket out of the two skeins, and would have made a medium sized one if I had more yarn.  The patterns for both the big & small, and the nonexistent medium size, are written out below. 


**LARGE BASKET**
Rounds 1-7: Start with the Begonia, and crochet in the round, with 6 sc increases per row. (42 sc at end of round 7)

Row 8: Change to Machu Pichu (without cutting previous yarn - the spike stitches and the abundance of colors in the yarns help hide the jog between rows, which will be on the inside of the basket).  Do a row of sc in **back loop only** to start the sides.

Row 9: Change to Begonia (without cutting previous yarn); do a row of [alternating spike stitch][1].

Row 10: Change to Machu Pichu (without cutting previous yarn); do a row of alternating spike stitch.

Row 11-22: Continue doing rounds of alternating spike stitch, changing colors without cutting yarn, in each row.  You will end with Machu Pichu.

Row 23: Add a round of [decorative slip stitch][2] in Begonia.

Finish off, weave in ends.


**SMALL BOWL**
Rounds 1-5: Start with the Begonia, and crochet in the round, with 6 sc increases per row. (30 sc at end of round 5)

Row 6: Change to Machu Pichu (without cutting previous yarn - the spike stitches and the abundance of colors in the yarns help hide the jog between rows, which will be on the inside of the basket).  Do a row of sc in **back loop only** to start the sides.

Row 7: Change to Begonia (without cutting previous yarn); do a row of [alternating spike stitch][1].

Row 8: Change to Machu Pichu (without cutting previous yarn); do a row of alternating spike stitch.

Row 9-12: Continue doing rounds of alternating spike stitch, changing colors without cutting yarn, in each row.  You will end with Machu Pichu.

Row 13: Because I had more Machu Pichu than Begonia left, I did a final row of alternating spike stitch in Machu Pichu (so 2 rows in that color). 

Edging: Thread the remaining end of the Begonia on a yarn needle.  Run the needle up through the back of rows 12 & 13, to hide this longer jog.  Add a whip stitch along the top edge of the basket. 

Finish off, weave in ends.


If I had more yarn, I would do a medium size version, so here's a pattern for a medium size basket.

**MEDIUM BASKET**
Rounds 1-6: Start with the Begonia, and crochet in the round, with 6 sc increases per row. (36 sc at end of round 6)

Row 7: Change to Machu Pichu (without cutting previous yarn - the spike stitches and the abundance of colors in the yarns help hide the jog between rows, which will be on the inside of the basket).  Do a row of sc in **back loop only** to start the sides.

Row 9: Change to Begonia (without cutting previous yarn); do a row of [alternating spike stitch][1].

Row 10: Change to Machu Pichu (without cutting previous yarn); do a row of alternating spike stitch.

Row 11-18: Continue doing rounds of alternating spike stitch, changing colors without cutting yarn, in each row.  You will end with Begonia.

Row 19: Add a round of [decorative slip stitch][2] in Machu Pichu.

Finish off, weave in ends.

Sunday, May 5, 2019

A Stack of Essential Oil Diffuser Bracelets with Lava Beads


Last Sunday, after we had checked out of the big Lodge in Asheville, sheepBlue, curiousfae, Abbeeroad & I went shopping again in downtown.  We visited a few gift shops, and I saw a nice little diffuser bracelet, that fit me well.  (I have tiny wrists and most bracelets are too big for me.)  I was going to pick it up, until I noticed the price of $20, for an item that was factory made.  Knowing I could pick up a strand of the lava beads for just a few dollars, I left the bracelet behind in Asheville.  A quick internet order later, and I had a mix of black and colored lava beads to make a stack of diffuser bracelets. 
(Clockwise from top are magenta dyed mountain jade, a coral pink Czech glass, and semi-precious aquamarine stones.)

To use them to diffuse essential oils, you simply place a drop on one of the lava beads, and allow it to soak in for about five minutes, so the oils won't stain any of your clothing.  Then just put it on, and go about your day.  I did 8 in the last two days, and have plenty of beads left to make many more.  I foresee another stack in my future! 

(This set includes just the lava beads, both the color and the black can be used for the oils.)

Last one I made, from agate and lava beads.  I think this one might be my favorite.