Showing posts with label Craftster. Show all posts
Monday, May 27, 2019
Elise Shawl in Turquoise Silk
This shawl was made for jemimah in the Use the Good Stuff Swap, on Craftster. I LOVE the excuse to look through my treasured pieces in my stash, and make something lovely for someone who will truly appreciate it. The pattern is the Elise Shawl, and is a free download on Ravelry. When I first saw it, I was a bit intimidated, as it looks intricate, but after an initial setup of 6 rows, you repeat the same two rows over and over until you get the size you want, then add a simple picot border.
The yarn is Darn Good Yarn's sport weight silk in Caribbean Current. I decided I wanted to highlight the purple and deep teal splotches in it, so I added some iridescent glass beads along the final row, in the picots and the single crochet directly above the previous double crochet post.
Blocked it came to 44" across and 22" deep at the center back, and I finished with just 12" of yarn leftover!
Monday, May 20, 2019
Strawberry Rhubarb Pie Hot Pad
This little hot pad/trivet was made as an extra for PerfectlyBohemian in the Great British Bake Off Swap. I saw a version of it, and decided I just had to make one. I mean, come on, how cute is a little pie made of yarn? I used a free pattern from Yarnspirations for the overall look and the lattices, but I wasn't thrilled with their 'pie filling', so instead I used a Youtube tutorial by One Dog Woof about how to crochet the bobble stitch in the round.
When I had what I felt was a big enough filling, I just crocheted a plain circle for the back, making sure I had enough increases to end my final row with the same number of stitches I had in the pie filling. (Mine came to 80.) Then I went back to following the Yarnspirations pattern, reducing the number of lattices per side to 6, sewing the lattice pieces in place, and then crocheting both layers together and adding the fluted border. It came out adorable, but I'll warn you, don't make it unless you like weaving in ends! So many ends!
Saturday, May 11, 2019
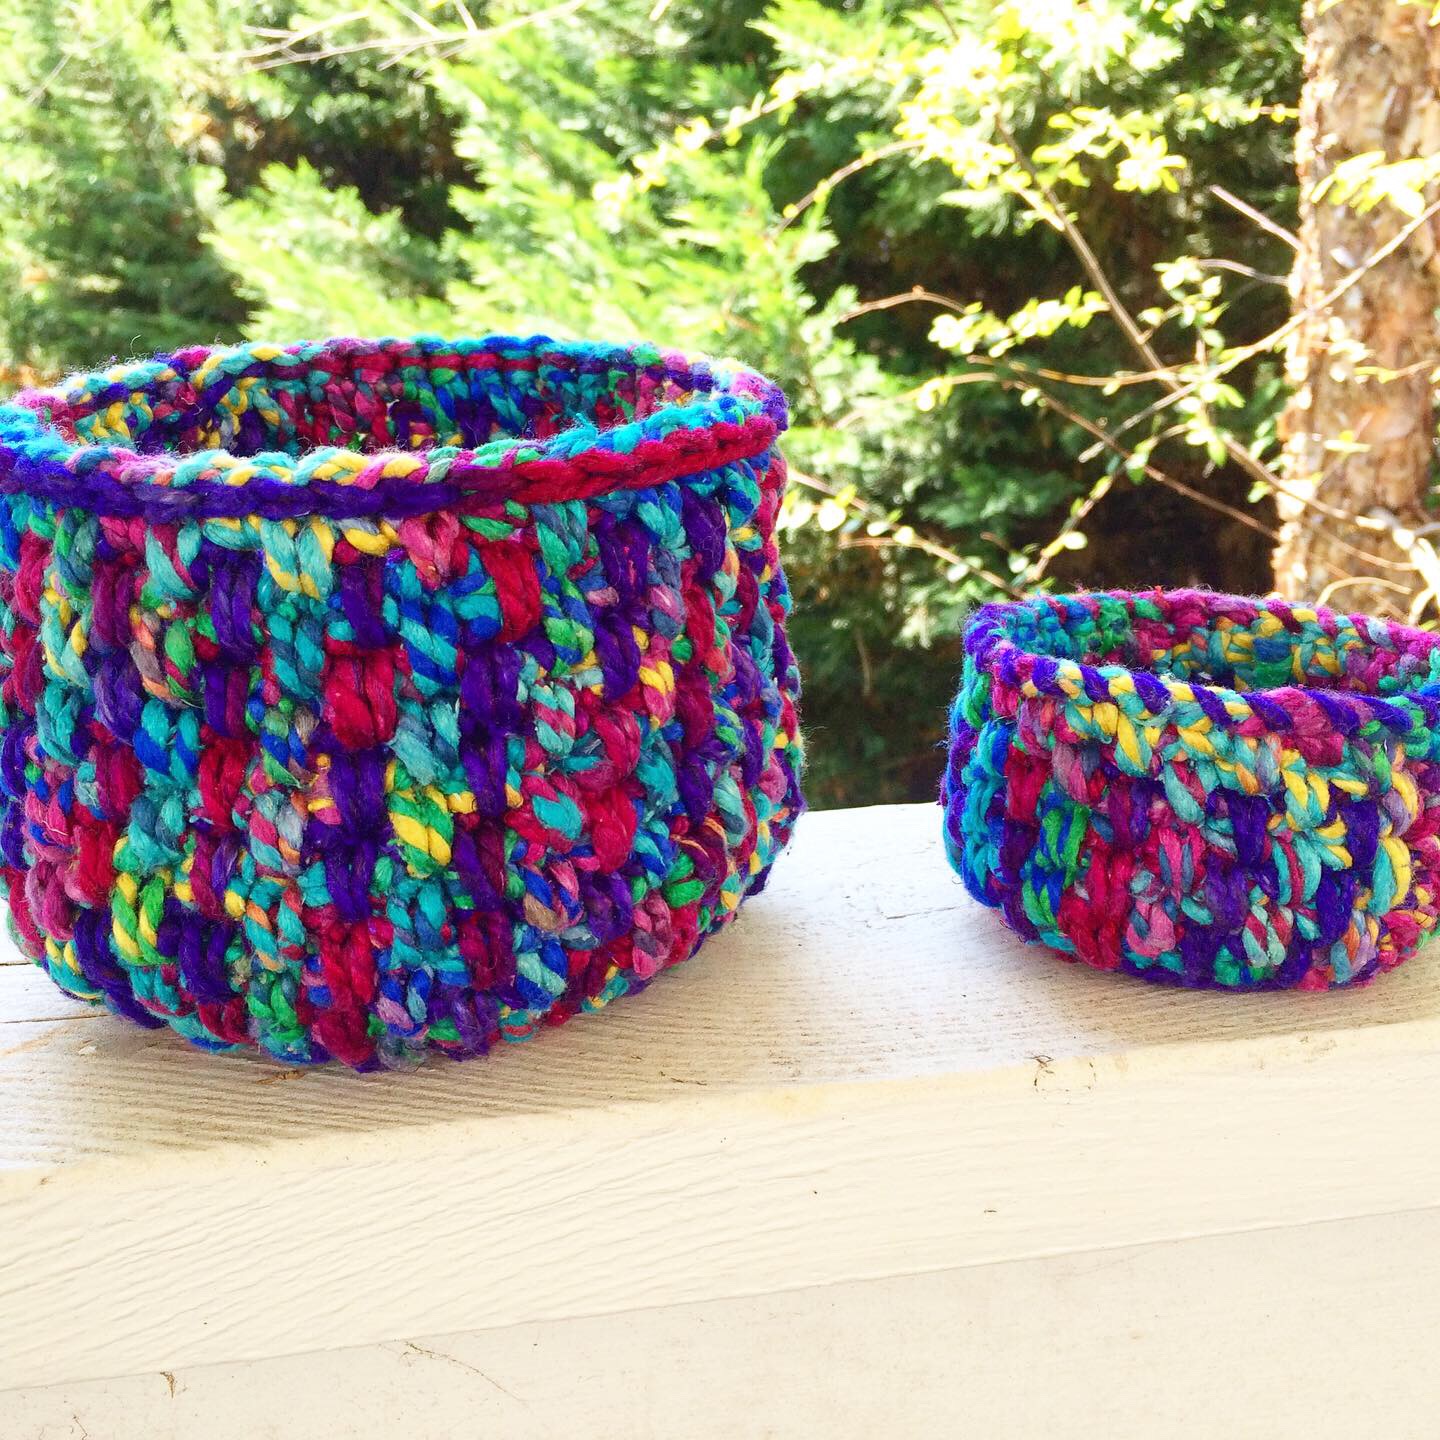
Good Stuff Baskets
These baskets were made for jemimah in the Use the Good Stuff Swap on Craftster, hosted by craftylittlemonkey. The idea of the swap is that life is short, so we should use the treasured craft supplies we would otherwise hoard, while we can.
While digging through my stash of silk yarns, I came across these two bright skeins from two months worth of Darn Good Yarn's monthly subscription box. I poked around Ravelry, trying to find some inspiration from other crafters. I saw an awesome post from user marianheart, where she combined the same two skeins I was trying to, into some baskets, based on a pattern for a floor pouf.
I decided I wanted to make something similar, and so I wrote my own pattern, using what I think is the same stitch (alternating spike stitch), but changing the base to one I've made a million times for bags and bowls. I made a large and a small basket out of the two skeins, and would have made a medium sized one if I had more yarn. The patterns for both the big & small, and the nonexistent medium size, are written out below.
**LARGE BASKET**
Rounds 1-7: Start with the Begonia, and crochet in the round, with 6 sc increases per row. (42 sc at end of round 7)
Row 8: Change to Machu Pichu (without cutting previous yarn - the spike stitches and the abundance of colors in the yarns help hide the jog between rows, which will be on the inside of the basket). Do a row of sc in **back loop only** to start the sides.
Row 9: Change to Begonia (without cutting previous yarn); do a row of [alternating spike stitch][1].
Row 10: Change to Machu Pichu (without cutting previous yarn); do a row of alternating spike stitch.
Row 11-22: Continue doing rounds of alternating spike stitch, changing colors without cutting yarn, in each row. You will end with Machu Pichu.
Row 23: Add a round of [decorative slip stitch][2] in Begonia.
Finish off, weave in ends.
**SMALL BOWL**
Rounds 1-5: Start with the Begonia, and crochet in the round, with 6 sc increases per row. (30 sc at end of round 5)
Row 6: Change to Machu Pichu (without cutting previous yarn - the spike stitches and the abundance of colors in the yarns help hide the jog between rows, which will be on the inside of the basket). Do a row of sc in **back loop only** to start the sides.
Row 7: Change to Begonia (without cutting previous yarn); do a row of [alternating spike stitch][1].
Row 8: Change to Machu Pichu (without cutting previous yarn); do a row of alternating spike stitch.
Row 9-12: Continue doing rounds of alternating spike stitch, changing colors without cutting yarn, in each row. You will end with Machu Pichu.
Row 13: Because I had more Machu Pichu than Begonia left, I did a final row of alternating spike stitch in Machu Pichu (so 2 rows in that color).
Edging: Thread the remaining end of the Begonia on a yarn needle. Run the needle up through the back of rows 12 & 13, to hide this longer jog. Add a whip stitch along the top edge of the basket.
Finish off, weave in ends.
If I had more yarn, I would do a medium size version, so here's a pattern for a medium size basket.
**MEDIUM BASKET**
Rounds 1-6: Start with the Begonia, and crochet in the round, with 6 sc increases per row. (36 sc at end of round 6)
Row 7: Change to Machu Pichu (without cutting previous yarn - the spike stitches and the abundance of colors in the yarns help hide the jog between rows, which will be on the inside of the basket). Do a row of sc in **back loop only** to start the sides.
Row 9: Change to Begonia (without cutting previous yarn); do a row of [alternating spike stitch][1].
Row 10: Change to Machu Pichu (without cutting previous yarn); do a row of alternating spike stitch.
Row 11-18: Continue doing rounds of alternating spike stitch, changing colors without cutting yarn, in each row. You will end with Begonia.
Row 19: Add a round of [decorative slip stitch][2] in Machu Pichu.
Finish off, weave in ends.
Tuesday, February 26, 2019
Mermaid & Plant Beaded Suncatchers
Last year, in the summer term of the Harry Potter Craftalong, I offered to make a suncatcher for those who completed their 'extra credit' in Herbology, aka did some word searches and crosswords I made up. Patty_o_furnitre and Audania1 took me up on it, but somehow the whole thing slipped my mind for AGES. Once I remembered, I asked them each what kinds of colors they would enjoy, and made up one for each of them. Patty_o's is going in her craft room, which is mermaid themed.
Audania1's is going in her kitchen, which is entirely white, and full of plants. The prism on this one is actually a giant Swarovski crystal pendant, that I have been hanging onto for ages, waiting for just the right project.
Monday, July 23, 2018
Wulf's Mandala Tablemat
I recently had the fun of being partnered with the wonderful Wulf, in the Use the Good Beads Swap. The emphasis was to use your most treasured craft supplies that you've been hoarding for years, always saying 'I need to wait till I have the most perfect, special use for them!' In talking to Wulf, he mentioned needing a mat for the center of his dining table, so I turned to my stash of silk sari yarn. Sadly, none of the yarns in my stash were working just right for what I wanted to make, so I actually bent the swap rules, by doing a yarn trade with someone on Ravelry. So I did use a precious material that had been hoarded, it just hadn't been hoarded by ME. (Don't worry, I made up for it with a second project, a fiber bowl that will be posted tomorrow. My inner Hermione is still afraid I'll be expelled from life for breaking an arbitrary rule.)
I actually wrote my own pattern for this one. It's crocheted with 1.5 skeins of silk sari yarn from Darn Good Yarn. It's made by recycling worn out clothing (saris), keeping the textiles from ending up in a landfill, and at the same time giving fair wages to women & girls in India and Nepal, allowing them to work from home. It might look tiny, as doilies are usually made with delicate lace weight yarn, but this one is actually a heavier worsted weight, so it actually measures 17" across.
Thursday, July 12, 2018
Scissor Fobs & Stitch Markers for Shawl-Along Friends
I've mentioned the Shawl-Along on Craftster a few times now. It is absolutely one of my favorite threads there, and I love how supportive everyone is of one another. A few weeks ago sheepBlue mentioned she had run out of a yarn halfway through a shawl, and was having trouble finding anymore of it in her area. I checked online and found that my Joann's had it in stock, and it happened to be on sale, so I offered to pick it up for her. Since I was going to be mailing it, I decided to add a few goodies to brighten her day.
I started with a scissor fob, so no one can try to run off with her snips. It was obviously inspired by her Craftster username, sheepBlue, with various shades of blue glass beads, and an adorable sheep charm.
Next I put together a set of stitch markers, featuring some of her favorite things, including a gun and skull for her love of the My Favorite Murder Podcast, another blue sheep, an old tv for her favorite shows, buttons, dinosaur, skeleton key, book & reading glasses for her book club, embroidery thread for her awesome embroidered Teesha Moore style patchwork bags, a little artist, and an eye.
About a week later, I received my new subscription box from Darn Good Yarn. It was a beautiful fingering weight silk in the color Morning Glory, along with a shawlette pattern. I was game to try it, but found that I was going to run out of yarn, so Curiousfae, another member of the Shawl-Along offered to swap yarns with me. She'd send the Morning Glory, and I'd send her a skein from a few months previous that I hadn't used yet.
Since I had just sent a box of crochet goodies to sheepBlue, I obviously had to send one to Curiousfae too! So she also got a scissor fob, this time of a little fairy leaning forward to peer at something.
And a set of stitch markers too, including a deck of tarot cards, a camera for her love of photography, a gnome, a caravan for her love of glamping, the Frog Prince, a K for her initial, a fae, paw print for her pup, rose, miniature fairy or gnome house, and a heart.
Sunday, April 1, 2018
Unicorn & Mermaid Cookie Mix in a Jar!
These were created in honor of Craftster's annual April Fool's Day celebrations. Our theme was Unicornicopia, so I created both Unicorn & Mermaid Cookie Mixes in a Jar. One of each will be going to my lovely nieces, one to my neighbor, and one of a unicorn-obsessed friend. Jar mixes have always made great gifts, and these are an awesome way to introduce kids to baking. Or just to amuse the princesses and mermaids in your life. I've done the tutorial with the Mermaid cookie mix, but the unicorn one is nearly identical, so I've listed any changes in parentheses.
Ingredients - listed per single jar of cookie mix
1 1/2 cups all purpose flour
1 teaspoon baking powder
1/2 teaspoon baking soda
1/4 teaspoon salt
1/2 cup granulated sugar
Gel food colorings
1/3 cup light brown sugar packed
½ cup EACH pearl chocolate candies in green and blue
(These are sixlets, found in cake decorating area of grocery stores or the wedding/party cake area in Walmart)
1 - 1.5 cup white chocolate chips
Sprinkles (if desired, used in Unicorn Cookie jars)
1-quart Mason jar
Mix the flour, baking powder, baking soda, and salt in a bowl. Whisk to combine.
Use a canning funnel, (or a rolled sheet of paper turned into a funnel) to pour in the flour.
At this point you need to check on your flour, because it will be in an uneven layer. Shake jar to evenly distribute the flour mix, then tap gently on the counter several times to get the flour to settle and pack itself in. If need be, use a spoon to lightly pack it down a bit further.
Pour your granulated sugar into a bowl, and add 2 drops of your blue gel food coloring. Mix really well, to evenly distribute the color. (For unicorn cookies tint your sugar pink or purple.) You may need to add more gel color to get your desired shade. I believe I used about 4 or 5 drops to get this shade of blue. Note: The coloring washed right off of my bowl & spoon, but just in case, don't use your brand new expensive white plastic bowls!
Use the funnel again, to pour your sugar layer on. I found that pouring my sugar around the edges of the funnel (rather than straight down) gave me a much more even layer. Again, tap your jar gently on the counter to settle the sugar layer.
Same deal with your brown sugar. I found that sprinkling it in by hand (since it had been packed into the measuring cup), allowed me to distribute it more evenly.
Now, use a spoon to tamp the brown sugar down, packing it more firmly around the edges of the jar, and leaving a small (but still packed) hill in the middle. (This is so that when we pour in our round pearl candies next, we will see more of them through the jar, as they will pool in the lower edges.) The act of packing it into the jar, also will help form a seal of brown sugar, keeping the blue granulated sugar and flour in place, rather than letting them spill into the candies above.
Pour in your green sixlets into the jar, and gently shake to evenly distribute. (For unicorn cookies pour in purple, white & silver sixlets, purple sugar pearls. Then add 1 Tablespoon of rainbow pearl sprinkles, allowing them to settle down in between the sixlets.)
Next layer in 1 cup of your white chocolate chips. (Same for Unicorn cookies.) On top of these add your blue sixlets. (For unicorn cookies then add rainbow heart candies or more sixlets.) Now, if you have any space left in the top of your jar, fill it in with more white chocolate chips. You want the jars to be packed pretty tight, so that the layers don't get mixed up.
Make some cute tags with the instructions for baking, and decorate the jars with a square of pretty cloth, or with ribbons or yarn. I created my tags with my Silhouette Cameo, cutting background tags out of purple and teal cardstock, then layering lacy cream paper with the recipe over them, and tying them all on with seam binding and fluffy yarns from my stash.
RECIPE TO INCLUDE WITH THE JAR:
[i]-Pour the contents of the jar into a large bowl and stir to combine. Add 1/2 cup of barely melted (not hot) unsalted butter, 1 beaten egg, and 2 teaspoons vanilla extract. Stir until combined. Chill for 30 minutes.
-Make golf ball sized portions of dough and place the dough balls onto lined baking sheets. Bake at 350°F for 8-10 minutes, until the centers of the cookies are just barely set.[/i]
And there you are, all ready for gift giving.
Thursday, February 22, 2018
Hooker's Helper Necklace & Scrappy
I promised yesterday to share the yarn cutter & stitch marker necklace that I made to match the Scrappy Quilt As You Go Basket. Each individual charm hanging from the pendant is actually a crochet stitch marker that can be removed and replaced via a lever-back earring hook. They are clipped to a pendant consisting of two sizes of metal hoops, and the large disk is a yarn cutter, perfect for NOT losing your scissors in the couch cushions.
Here are each of the stitch markers laid out individually. They include Vintaj charms, Czech glass beads, and freshwater pearls. The color scheme was chosen to match the scrappy quilted basket.
Here's a view of the pendant, when the stitch markers are removed. I love how it came out, and have ordered a copper toned pendant to make one for myself soon.
Saturday, February 10, 2018
Fairy Godmother Dreamcatcher
While working on a few other projects for the Fairytale Swap, I bumped into some ribbon in my stash that reminded me of the Princess Tote I was working on for my partner. It was so pretty, I wondered what I could do with it for her, resolving to at least use it to wrap her gifts up. A few hours later I dug through one of my containers of charms, and saw a magic wand charm, and it came to me. Fairy Godmother Dreamcatcher! Full of cute fairytale charms, and beautiful ribbons and fibers reminiscent of princess gowns and gossamer Fairy Godmother wings.
The hoop is wrapped with the original ribbon, and he web is strung with a few strands of metallic silver and lilac embroidery floss held together. In the center is a light purple Swarovski crystal heart, with a silver Fairy Godmother on one side, and a pocket watch on the other. Below that, hung among the ribbons are a rhinestone encrusted angel wing, filigree crescent moon with a pumpkin coach hanging from the center, a magic wand, a crown, and several antique gold stars. The fibers are a mix of ribbons, seam binding, yarn, threads, etc. I'm really happy with how it came out, but none of the pictures quite captured the colors correctly; deep sapphire blue, bright lilac purple, burnt pumpkin orange, and a rich magenta.
Thursday, February 8, 2018
We Can't All Be Princesses Tote
This was a nice quick project made for itsmereba in the Fairy Tale Swap on Craftster. I found the sentiment repeated on one of her Pinterest boards several times, and decided she needed it on a tote. The design was cut on my Silhouette Cameo from hot pink, lavender, and gold glitter heat transfer vinyl.
I worried some other wannabe princess might try to walk off with it when Reba was busy with important matters of her realm, so I added a monogram on the back for her. The cut files are both from the Silhouette Store online.
Saturday, December 23, 2017
Harry Potter Potions Ingredients
As I mentioned the other day, one of my projects for the Harry Potter Holiday Swap wasn't a Christmas ornament. Emma doesn't decorate much for Christmas, she requested something for her Cabinet of Curiosities. I remembered I had some glass bottles in my stash that were just begging to be turned into potion ingredient bottles.
The gillyweed was a bit of leaf trim that I just hit the edges of with a darker green marker to give it some added definition. The text was cut out on my Silhouette Cameo, and the rest of the decorations came from my stash. Some black tipped brown flowers, a wooden dragon charm that I colored with some Tim Holtz distress crayons, ragged black cheese cloth leftover from a Halloween wreath, number charms I had in my jewelry stash, a Swarovski crystal ring, twine, mermaid charm, skull bead, glass Hamsa charm, etc. I love digging through all my really random bits and bobs to find things to decorate the bottles with, and hope to do some more in future.
The Runespoor bottle was clear originally. It was dyed on the inside with alcohol inks. I was trying for a cool marbled effect that I saw in a tutorial, but it didn't work the way she said it would. I like the overall effect it created anyways. I had previously used ugly lumpy brown potato shaped freshwater pearls as doxy eggs in a long ago potions cabinet, and remembered that I had several strings of pearls that have holes wayyyyy too tiny to string onto anything I have in my stash. At first I just added the white ones, but I wanted there to be more visual interest in the bottle, so I dug around till I found some royal blue, magenta, pink, and even silver pearls too. I've decided that since no one really knows what Runespoor Eggs look like, that perhaps they are different colors depending on the age of the Runespoor that laid them, or the time of year or day they were collected.
The gillyweed was a bit of leaf trim that I just hit the edges of with a darker green marker to give it some added definition. The text was cut out on my Silhouette Cameo, and the rest of the decorations came from my stash. Some black tipped brown flowers, a wooden dragon charm that I colored with some Tim Holtz distress crayons, ragged black cheese cloth leftover from a Halloween wreath, number charms I had in my jewelry stash, a Swarovski crystal ring, twine, mermaid charm, skull bead, glass Hamsa charm, etc. I love digging through all my really random bits and bobs to find things to decorate the bottles with, and hope to do some more in future.
Wednesday, October 11, 2017
Dragon Egg Bag
I recently hosted another round of the Back to Hogwarts Swap on Craftster, and was so happy to swap with the lovely patty_o_furniture. She has been renovating her family movie room with an all Harry Potter theme, including murals of Hogwarts, and a kick-ass Honeyduke's candy cupboard, and has filled the room with awesome geeky handmade HP goodies, some made by her, and some made by the rest of the Craftster community. I just happened to have a bunch of scale maile supplies in my jewelry stash that I bought last year to experiment with, so I dug through my yarn stash and found a good color match of yarn. I finished it with some leather drawstrings, and handmade glass pony beads leftover from making some dreamcatchers. The pattern came from toohotheaded on Etsy. The yarn is Caron Simply Soft in garnet, and the scales are a pattern of dark red, light red, copper, gold, and black, and came from a combination of the Ring Lord and Fire Mountain Gems. The pattern was easy to follow, and I would totally recommend it. Hopefully it will fit in with all her HP swag in the movie room.
Sunday, September 10, 2017
Celestial Dishcloths
Some of the Mods on Craftster recently decided we needed some sort of happy swap amongst ourselves. We all decided to fill a small Flat-Rate box, and I was doing well adding bits and bobs, but I had a bit of dead space, so I decided to whip up a dishcloth to fill some space and cushion some things. I got the fun of crafting for kittykill.
| Sunshine Dishcloth Pattern |
| Cloud Dishcloth Pattern |
At this point, it should have been clear I had a problem... But since I couldn't seem to stop hooking, I finally decided that kittykill clearly needed a whole set of celestial dishcloths, and added in a star and a rainbow. Well, the best I could come up with for a rainbow, since I crocheted them all from stash.
| Star Dishcloth Pattern |
| Fire Blossom Dishcloth Pattern |
Saturday, September 9, 2017
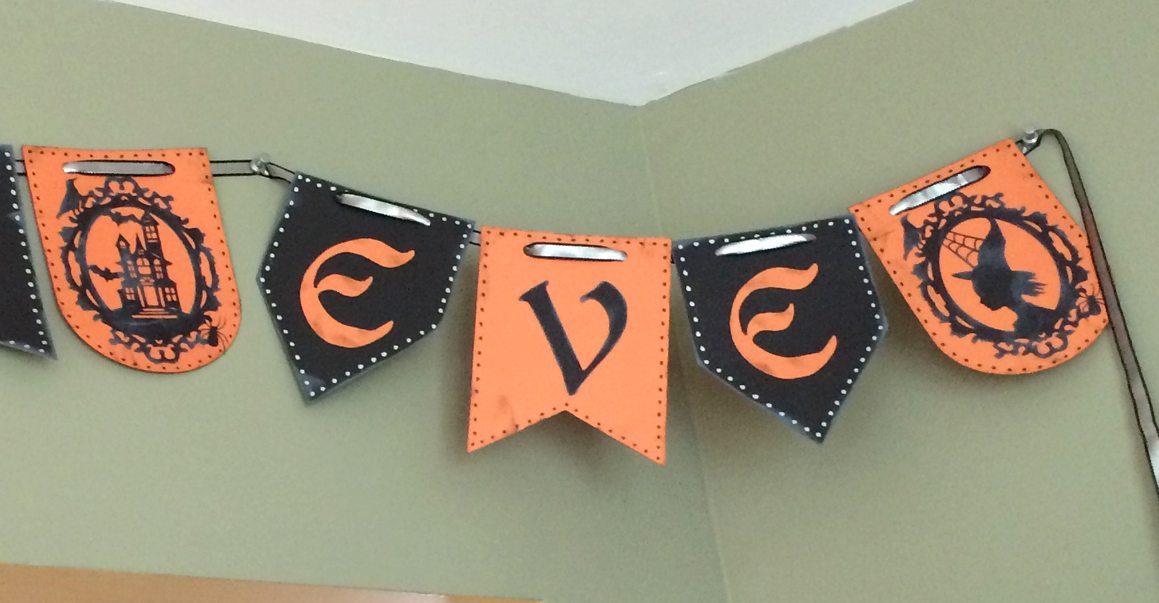
Trio of Inexpensive Vintage Halloween Crafts
I recently participated in the Vintage Halloween Swap on Craftster, and had the fabulous good fortune to be partnered up with my friend FiberAlchemist. The first thing I decided on making was a Spider Web Table Topper, that I saw the pattern for on Red Heart's website. It calls for 1 skein of their Super Saver, but since I hate how scratchy that stuff feels, I made mine with most of a skein of Premier Yarns Everyday Soft Worsted Heather in charcoal for the web, and half a skein of Lion Brand Heartland in Yosemite for the lacy edging, both dug out of my stash.
While I was making it, I discovered a flaw in the pattern. Sadly I was on the last row of webbing at the time! I went back and rewrote the pattern, made myself a crazy color coded chart, and even a matching set of rainbow stitch markers to match the chart, and re-crocheted the whole thing. Glad I did though, since it came out so much nicer after I fixed the pattern. Since the yarn came from stash, the only cost was my time in frogging and rewriting the pattern.
Since I was trying to craft from stash as much as possible, I decided to look around and see what I could make with my Silhouette. I found some black and orange card stock, and some silver ribbon with black edging that I knew FiberA would like. I bought the cameo cut files from the Silhouette store, which was the only cost.
After cutting all the bits and pieces, I distressed everything with some Tim Holtz distress ink pads, distress paint pads, and markers, before putting it all together with glue dots. Not bad for a $4 project!
My final project for FiberA was a sign I saw a tutorial for on the Silhouette blog, which called for cutting the words out and using the 'dead space' as a stencil instead of using the words themselves. Then using a paint pen to 'scribble' in the letters, and removing the vinyl to leave the scribbles behind. I started off by following the tutorial, but sadly, that just did NOT work. The paint pen bled under the vinyl stencil so much that the words were completely illegible! So I sanded the paint off, and started over. I used the Silhouette for what it was intended, by cutting the words out of silver vinyl, and applying them like normal. But there was a bit of dead space at the top, so I added a scrolly skull to fill it in. I like how it kinda feels like a tombstone with the curved top. The wooden sign came from Michael's, and was priced as $10.99, but I had a 50% off coupon, so it was $5.49, plus $2 for the cut files from Silhouette. That made a grand total of $11.49 for 3 awesome projects.
Subscribe to:
Posts (Atom)